Every successful cannabis harvest begins long before a seed sprouts. It starts with a clear vision: what do you want your finished product to achieve? The remarkable versatility of the Cannabis sativa plant means it can be cultivated for a myriad of purposes – from the connoisseur’s prized flower to the high-potency material for extracts, the functional base for edibles, or simply the sheer joy of nurturing a living plant.
Gone are the days when a single growing approach sufficed for every ambition. To truly unlock the plant’s potential and meet your specific goals, your cultivation strategy – from strain selection to post-harvest processing – must be meticulously aligned with your ultimate application. Let’s delve into how different end goals shape your decisions in the grow space, informed by the latest scientific understanding of cannabis chemistry and breeding.

The Foundation of Purpose: Understanding Cannabis “Chemovars”
Traditional cannabis labels like “Indica,” “Sativa,” and “Hybrid” offer a general idea of plant structure or a strain’s lineage, but they fall short in predicting specific effects. Modern understanding points to the chemical profile as the true driver of experience. Scientists often use the term “chemovar” (chemical variety) to classify cannabis based on its unique blend of compounds, particularly:
- Cannabinoids: The most famous compounds, like THC (for psychoactivity) and CBD (for potential therapeutic benefits). But also the vast array of minor cannabinoids (e.g., CBG, CBN, THCV) that contribute to the plant’s complex effects and are gaining significant research interest, as highlighted in studies on topical cannabis applications. The ratio and total concentration of these compounds in a strain are paramount.
- Terpenes: These aromatic molecules are responsible for the distinct scents and flavours of cannabis – think pine, citrus, earth, or sweet notes. Beyond aroma, terpenes are pharmacologically active, possessing properties like anti-inflammatory, analgesic, or sedative effects. Crucially, they interact with cannabinoids to create the “entourage effect,” a synergy that can profoundly shape the overall experience. Research using advanced techniques like headspace GC-MS now provides a deeper insight into these often-subtle aromatic undertones and their correlations with cannabinoid profiles.
Historically, cannabis breeders selected strains based on desirable aromas, inadvertently shaping their terpene biosynthesis. Just as master brewers select yeast strains for specific flavours and fermentation profiles, cannabis cultivators increasingly select specific chemovars for their precise chemical output. We wrote about this last week and in-depth in the past. Check out those blogs here.

Tailoring Your Grow: Strategies for Different Applications
Once you define your end goal, your cultivation pathway becomes clearer:
1. Growing for Top-Tier Flower (Recreational & Medicinal Enjoyment)
When the goal is premium flower for smoking or vaporising, “bag appeal” (visual aesthetics) and “terpene expression” are paramount.
- Strain Selection:
- Terpene Prowess: Prioritise strains known for rich, complex terpene profiles. These are what deliver the nuanced aromas, distinct flavours, and contribute significantly to the overall experience through the entourage effect. Look for genetics that consistently express high levels of desirable terpenes.
- Desired Effects: Choose chemovars with cannabinoid ratios and terpene profiles that align with the intended experience—be it uplifting and creative (e.g., high Limonene), deeply relaxing (e.g., high Myrcene), or balanced for a functional effect.
- Aesthetics & Structure: Select strains genetically predisposed to dense bud structure, vibrant colours, and abundant trichome coverage, as these contribute directly to visual appeal and resin content.
- Cultivation & Post-Harvest:
- Precise Environmental Control: Maintaining optimal temperature, humidity, and airflow throughout the flowering stage is critical for maximising terpene production and preventing mould. This is an ongoing battle, especially in variable climates.
- Peak Harvest Timing: Harvest at the precise moment when trichomes indicate peak maturity for desired cannabinoids and terpenes (e.g., majority cloudy with some amber), as this window maximises the target profile.
- Meticulous Drying & Curing: As previously discussed, proper drying and slow curing are non-negotiable for preserving delicate terpenes, preventing degradation of cannabinoids, and developing a smooth, flavorful final product. Burping jars correctly or utilising humidity control packs is essential for optimal curing.

2. Growing for Concentrates (Extracts)
Cultivating for extracts shifts the focus from the plant’s physical form to maximising the quantity and quality of its resin (trichomes), which will be separated and refined into products like rosin, shatter, wax, or diamonds.
- Strain Selection:
- Trichome Abundance & Quality: The primary criteria here are strains known for producing copious amounts of large, easily rupturable trichomes. Some genetics are simply better “resin producers.”
- Target Cannabinoid/Terpene Concentration: Different extracts might favour specific cannabinoid profiles (e.g., high THCA for diamonds, diverse cannabinoids for full-spectrum extracts). Terpene concentration within the trichomes is also crucial, especially for “live” extracts that prioritize fresh aroma.
- Extraction Efficiency: Consider how well the trichomes detach from the plant material, which can vary by strain and influence yield with methods like ice water extraction or dry sifting.
- Cultivation & Post-Harvest:
- Cleanliness: Maintaining an impeccably clean grow environment is paramount. Any contaminants (dust, pest residues) on the plant will end up in the extract, compromising purity.
- Harvest Timing: For “live” extracts (like live rosin or live resin), plants are often harvested slightly earlier than for smoking flower and immediately flash-frozen to preserve volatile terpenes at their freshest. For dry extracts, efficient drying of resinous material is key.
- Targeted Drying: If drying for extracts, methods prioritise rapid moisture removal from the trichomes while preserving them, rather than the slow, nuanced cure of smoking flower.
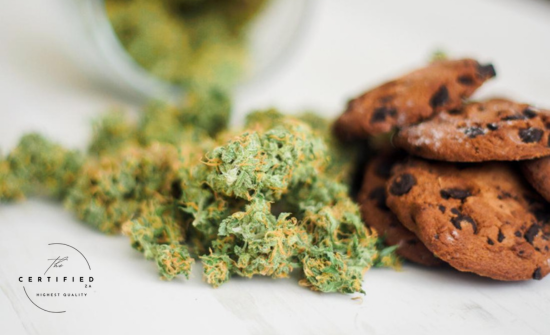
3. Growing for Edibles
Cultivating for edibles prioritises total cannabinoid yield that can be efficiently infused into food products. While terpenes can contribute to flavour, they are often secondary to raw cannabinoid quantity.
- Strain Selection:
- Overall Cannabinoid Mass: Focus on strains known for high cannabinoid production throughout the entire plant, including trim and smaller buds, not just the large top colas.
- Desired Cannabinoid: Whether you want THC-dominant or CBD-dominant edibles will guide your choice.
- Ease of Decarboxylation: While most cannabis will decarboxylate with heat, selecting strains that convert efficiently is beneficial.
- Cultivation & Post-Harvest:
- Full Plant Utilisation: This goal allows for efficient use of a wider range of plant material – not just premium buds, but sugar leaves and smaller nugs – all of which contain valuable cannabinoids.
- Decarboxylation: A controlled heating process is crucial to convert the raw, acidic cannabinoids (THCA, CBDA) into their active, non-acidic forms (THC, CBD) for maximum effect in edibles. This can be done post-drying or as a separate step before infusion.
- Batch Consistency: For commercial edible production, consistent cannabinoid content across batches is essential, requiring precise measurement and processing protocols.

4. Growing for the Love of It (Hobbyist/Learning)
For many home growers, the primary motivation is the intrinsic reward of cultivation itself—the joy of watching a plant grow, the learning process, and the satisfaction of producing their own cannabis, regardless of commercial metrics.
- Strain Selection:
- Curiosity & Preference: Choose strains based on appealing aromas, unique growth characteristics, or simply the desire to try something new.
- Ease of Growth: For beginners, selecting robust and forgiving strains allows for a smoother learning curve, building confidence without the frustration of finicky genetics.
- Novelty & Experimentation: This goal encourages exploring unusual chemovars or trying experimental techniques without the pressure of a bottom line.
- Cultivation & Post-Harvest:
- Emphasis on Learning: Every grow is an opportunity to experiment with different techniques (e.g., nutrient adjustments, training methods) and observe plant responses firsthand.
- Process Over Perfection: While striving for quality, the focus remains on enjoying the journey of cultivation, understanding the plant’s life cycle, and the satisfaction of producing your own cannabis, regardless of achieving peak commercial yield or potency.


Your Compass for the Cannabis Garden
Defining your cannabis cultivation goals upfront is the most powerful tool in your grower’s arsenal. By understanding the distinct demands of each application – from the precise chemical profiles for top-tier flower or extracts to the efficient cannabinoid yields for edibles, or the sheer joy of hobbyist growing – you can make informed decisions from strain selection to final product. Leverage lab testing to understand the true chemical signature of your chosen genetics, and embrace intentional cultivation to achieve consistently rewarding results.