No Audio File Available. Weare experiencing software issues and will upload the audio ASAP.
As the cannabis cultivation journey progresses, we enter a pivotal phase—post-harvest processing. Last week, we explored the role of drying and curing in maximising the quality and potency of your harvest. This week, we’ll take a closer look at the art and science of drying and trimming cannabis, two critical steps that shape the final product’s quality, appeal, and therapeutic potential. Previously we have mentioned environmental controls and the importance of being able to regulate the space.
The Importance of Drying in Cannabis Cultivation
Drying is the first post-harvest step that stabilises cannabis by removing excess moisture. Proper drying preserves cannabinoids, terpenes, and overall product integrity while reducing the risk of mould or microbial contamination. According to research, maintaining specific conditions—temperatures between 16–21°C and relative humidity around 50–60%—ensures the preservation of volatile terpenes and the optimal conversion of acidic cannabinoids like THCA to THC.
Innovative drying methods, such as microwave-infrared technology and solid-state microwave drying, offer faster and more energy-efficient alternatives to traditional hang-drying techniques. While these methods maintain comparable cannabinoid levels, they require careful adaptation to prevent terpene loss or trichome damage. We will touch on this a bit more below.
Over the many years, I have noticed so many different ways to go about these steps with so many varying results. I have stopped trying to give my 2c on the matter directly. All I wish is to explain the importance of the steps and why it is crucial to consider them. Let me know what methods you go about in your our growing journies, I am keen to hear from you.
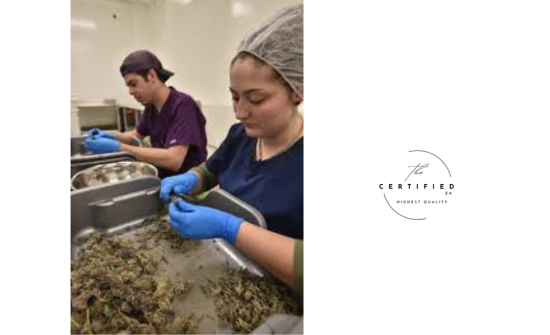
Trimming: Wet vs. Dry—Understanding the Differences
Trimming involves removing excess leaves and stems from the cannabis flowers to improve their appearance and potency. While both wet and dry trimming achieve similar outcomes, their methodologies vary:
Wet Trimming:
Wet trimming involves removing the fan leaves and sugar leaves from cannabis flowers immediately after harvesting, while the plant material is still fresh and moist. This method offers specific benefits and creates unique conditions that influence the drying and curing processes.
Moisture Removal at the Start: Wet trimming eliminates much of the plant’s water-laden foliage at the outset, which helps reduce the overall moisture content of the harvested material. By removing fan leaves before drying, growers minimize the risk of moisture pockets forming around dense buds, which can lead to mould or mildew.
Enhanced Airflow for Drying: Trimming wet cannabis exposes the buds directly to airflow during the drying stage, ensuring a more uniform drying process. Without the extra foliage, air circulates more freely around the flowers, reducing drying times and helping to stabilize humidity levels in the drying environment.
Impact on Trichomes: When trimming fresh buds, trichomes—the resinous structures containing cannabinoids and terpenes—are more pliable due to the high moisture content. This reduces the risk of trichome damage or loss during handling. However, excessive or careless handling during wet trimming can still cause bruising or degradation of delicate trichomes.
Simpler Cleanup and Efficiency: Wet trimming tends to be faster and less labour-intensive than dry trimming because fresh plant material is more manageable and doesn’t crumble or stick to tools as much. This is not to say that it is not a sticky process at times. The processes of wet trimming can also occur a day before harvesting, with some growers using the last day or so to start removing big fan leaves, making the harvesting and actual trimming a bit easier. Additionally, the removed leaves are fresh and can be repurposed immediately for extracts or composting, enhancing efficiency.
While wet trimming creates a streamlined drying process, it also removes some of the natural “moisture barriers” that leaves provide, potentially speeding up the drying phase too much if environmental conditions aren’t carefully controlled. As a result, growers must closely monitor temperature and humidity to avoid over-drying or terpene loss. Wet trimming is especially favoured for large-scale operations where time and space optimization are critical.

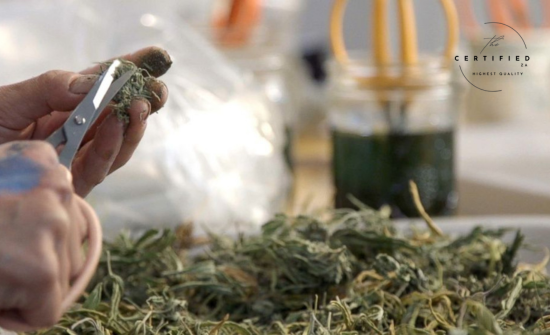
Dry Trimming:
Dry trimming is the process of removing excess leaves from cannabis flowers after the plant has been fully dried. This method allows the buds to retain more of their natural moisture during the drying process, which can have significant effects on quality, terpene retention, and the overall structure of the final product.
Preservation of Terpenes During Drying: By leaving fan and sugar leaves intact during the drying stage, the outer layers of foliage act as a natural barrier, protecting the delicate trichomes and terpenes from excessive exposure to air, light, and handling. This helps to slow the drying process, creating an environment where terpenes are less likely to evaporate prematurely, resulting in a richer aroma and flavour profile in the final product.
Moisture Retention for Controlled Drying: With dry trimming, the leaves shield the buds, slowing down moisture evaporation and contributing to a more gradual drying phase. This extended drying time can enhance the chemical complexity of cannabinoids and terpenes while reducing the harshness of the smoke or vapour.
Handling Trichomes: Once the cannabis is dried, trichomes become more brittle and can easily detach from the buds during handling. Dry trimming requires extra care to avoid damaging or losing these resinous glands, which contain the plant’s active compounds. Proper tools and techniques, such as using sharp scissors and minimizing pressure on the buds, are essential to preserving trichome integrity.
Time and Labour Considerations: While dry trimming can enhance quality, it is generally more labour-intensive than wet trimming. The dried leaves can be harder to cut and may stick to tools, requiring frequent cleaning. However, this method is often preferred by growers who prioritize terpene preservation and bud aesthetics over time efficiency. Often referred to as ‘Trim Jail’ by many, dry trimming can either be extremely therapeutic or very painstaking. Personally, I have found it to be torture and I hate it. Yet, it is the method of choice for me too.
Dry trimming is ideal for growers who want to emphasize the natural essence of their cannabis, creating a product with superior aroma, flavour, and visual appeal. However, it requires patience and a controlled drying environment to achieve the best results, making it a technique that rewards careful craftsmanship.
Studies reveal a trade-off between the two: wet trimming prioritizes cannabinoid preservation, while dry trimming emphasizes terpene retention. Growers must assess their goals to determine which method aligns best with their desired outcomes.
Optimizing Drying Spaces:
Ensure adequate airflow using fans or dehumidifiers to avoid moisture buildup and uneven drying. Implement proper lighting controls to reduce exposure to UV rays, which can degrade cannabinoids and terpenes. Read up more on our blog last week to understand the importance of all these things.
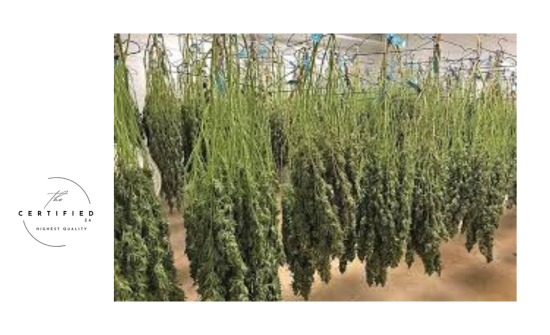
Hang-Drying for Optimal Results
Hang-drying is the traditional and most widely used method for drying cannabis due to its simplicity and effectiveness. This technique involves suspending cannabis plants upside-down in a controlled environment, allowing airflow to naturally wick away moisture from the buds.
For large plant sections, such as branches, it’s essential to remove excess fan leaves before hanging to improve airflow and reduce drying time. These sections should be trimmed evenly to avoid overly dense areas that could retain moisture and encourage microbial growth. For growers opting to hang entire plants, ensure adequate spacing between plants to allow air circulation around the canopy. This method slows the drying process slightly, which can enhance terpene preservation and improve the overall quality of the final product.
Microwave-Infrared Drying: A Modern Alternative
Microwave-infrared drying is an innovative technique gaining traction in cannabis production, especially among commercial growers. This method uses a combination of microwave energy and infrared radiation to remove moisture rapidly while preserving cannabinoids and terpenes. The microwaves heat the water molecules inside the plant material, causing them to evaporate, while the infrared radiation evenly distributes heat, preventing hot spots and maintaining the structural integrity of the buds.
This approach significantly reduces drying times—from days to mere hours—making it an attractive option for large-scale operations. However, the initial investment can be substantial. Microwave-infrared drying systems typically range from $10,000 to $50,000 or more, depending on capacity and features. While this cost may be prohibitive for small growers, the efficiency and scalability make it a viable solution for commercial enterprises looking to streamline their post-harvest processes.
Both traditional and modern drying techniques offer unique advantages, and growers must weigh their resources, goals, and scale to choose the method that best suits their needs.
Microbial Control
Recent studies highlight the importance of regulating yeast and mould levels during drying. Factors like genotype, humidity, and airflow play a significant role in reducing microbial growth and ensuring product safety. For dry trimmers, ensuring correct monitoring practices and checks are important. Microbial issues are more prone in this method than wet trimming, however, there are other things to watch out for in that regard.
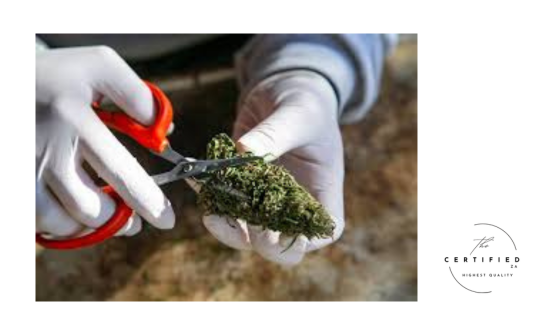
The Craftsmanship Behind Trimming
Whether you choose wet or dry trimming, attention to detail remains paramount. Hand-trimming allows for precision and minimizes damage to trichomes, but it’s labour-intensive. Without a doubt, if you take your time to develop technique and patience you to will have manicured flowers like in the movies. Mechanical trimmers provide efficiency but may compromise quality if not handled properly. Sometimes better suited for wet trimming methods, but recently many companies have adapted their rigs to handle both wet and dry trimming. Balancing these approaches with your operational scale and product goals is essential for success.
Drying and trimming are where the artistry of cultivation meets scientific precision. Whether you’re drying in a traditional hang-dry room exploring advanced microwave technologies, or trimming wet or dry, your choices will define your cannabis product’s final quality. By tailoring these processes to align with your goals—whether maximizing cannabinoids, terpenes, or aesthetic appeal—you set the stage for a premium end product that reflects your dedication and expertise.
Next week, we’ll delve deeper into advanced curing techniques, exploring how slow, controlled maturation unlocks the full potential of your cannabis. Until then, embrace the journey and celebrate each step as a testament to your craft.