Posted on

Harnessing the Power of Mycorrhizal Fungi

Harnessing the Power of Mycorrhizal Fungi

A Deeper Look at Soil Health

Over the past few months, we have explored various aspects of cannabis cultivation, from soil biology and nutrient management to sustainability practices that can minimize the environmental impact of growing. Last week, we examined how growers can implement regenerative farming, composting, and water conservation techniques to create a more sustainable cannabis industry. But what if nature itself had a built-in system to improve plant health, increase nutrient absorption, and create stronger, more resilient cannabis plants?

That’s where mycorrhizal fungi come in. As Jeff Lowenfels explores in Teaming with Fungi, these beneficial fungi play a critical role in plant development, root health, and ecosystem balance. In this blog, we dive into how cannabis growers can harness mycorrhizal fungi to enhance soil health, boost yields, and reinforce the principles of regenerative cultivation that we discussed last week.

What Are Mycorrhizal Fungi?

Mycorrhizal fungi are symbiotic microorganisms that form beneficial relationships with plant roots. These fungi extend their hyphae (thread-like structures) into the soil, dramatically increasing the surface area available for nutrient and water absorption. In return, plants provide the fungi with carbohydrates derived from photosynthesis.

There are two primary types of mycorrhizal fungi that interact with plants:

  • Endomycorrhizae (Arbuscular Mycorrhizae, AMF) – These fungi penetrate plant root cells, forming structures inside the root tissue that aid in direct nutrient exchange. Cannabis plants thrive best with AMF, as they enhance phosphorus uptake, which is essential for root and flower development.
  • Ectomycorrhizae – These fungi surround plant roots rather than penetrating them, forming a protective sheath. While ectomycorrhizae are more common in trees, they still contribute to overall soil health and biodiversity.
Harnessing the Power of Mycorrhizal Fungi

How Mycorrhizal Fungi Benefit Cannabis Plants

The establishment of mycorrhizal fungi in the cannabis root zone is a game-changer for growers seeking to maximize plant vigor, nutrient uptake, and stress resistance. Studies have shown that Rhizophagus irregularis, a well-researched species of arbuscular mycorrhizal fungi (AMF), has a profound impact on cannabis seedlings. When properly introduced, mycorrhizal fungi attach to plant roots and extend their hyphal network deep into the surrounding soil, significantly increasing the root system’s ability to absorb water and nutrients.

Recent research into Rhizophagus irregularis demonstrated that cannabis plants treated with AMF exhibited a 34.14% increase in root length, compared to untreated plants. This expansion in root mass leads to improved nutrient accessibility, especially phosphorus, which is essential for both vegetative and flowering stages of cannabis. The study also found that AMF-treated plants had higher survival rates and enhanced overall seedling quality, which is particularly important for growers looking to reduce transplant shock and increase resilience against environmental stressors.

Enhanced Nutrient Uptake

One of the most important benefits of mycorrhizal fungi is their ability to access nutrients that plant roots alone cannot reach. Studies show that AMF improves the uptake of:

  • Phosphorus (P): Critical for root development and flowering.
  • Nitrogen (N): Supports vigorous growth and leaf health.
  • Micronutrients: Including zinc, copper, and iron—elements essential for plant metabolism.

Phosphorus is a key element in cannabis metabolism, resin production, and flower formation, yet it is often one of the least bioavailable nutrients in soil due to its tendency to form insoluble compounds. Mycorrhizal fungi, particularly Rhizophagus irregularis, have a unique ability to solubilize and mobilize phosphorus, making it more accessible to cannabis plants.

The study found that plants inoculated with AMF had 24.3% higher phosphorus concentrations compared to those without fungal colonization. This is crucial because phosphorus plays a vital role in energy transfer, root development, and terpene biosynthesis. Furthermore, the fungi contribute to nitrogen absorption, although the effect was less pronounced than with phosphorus. These findings suggest that establishing strong mycorrhizal networks early in the cannabis growth cycle can optimize nutrient efficiency, reduce the need for synthetic fertilizers, and promote overall plant health.

Harnessing the Power of Mycorrhizal Fungi

Improved Drought Resistance and Water Absorption

As discussed in our blog on water conservation in cannabis cultivation, mycorrhizal fungi improve water efficiency by extending the root system and increasing water retention in soil. This is particularly beneficial for growers in drought-prone regions like South Africa, where water conservation is essential.

Disease Resistance and Soil Health

Mycorrhizal fungi act as a natural defense system for plants. By colonizing root systems, these fungi create a protective barrier against harmful pathogens and soil-borne diseases. This aligns with the principles of Integrated Pest Management (IPM) that we covered earlier in the cultivation series.

Additionally, by fostering a diverse microbial community, soil becomes more resistant to disease outbreaks, further reducing the need for chemical interventions.

How to Introduce and Support Mycorrhizal Fungi in Your Grow

If you want to incorporate mycorrhizal fungi into your cannabis cultivation, here are the best ways to do so:

Use Mycorrhizal Inoculants

Many growers introduce beneficial fungi by applying mycorrhizal inoculants directly to seeds, clones, or transplants. These powders or liquid solutions contain spores of AMF, which attach to plant roots and establish fungal networks. There are many different options of spores on the market.You can also attempt to colonise your own fungal situation. We wrote about this in our Korean Natural Farming blog. Essentially we are going to use Rice, a box and some fungal matter from woody pieces laying around.

Avoid Tilling and Soil Disruption

Just as we discussed in last week’s regenerative farming blog, no-till farming helps preserve fungal networks. Tilling breaks apart mycorrhizal structures, reducing their effectiveness and disrupting soil microbiology. Forcing colonies to reestablish themselves and in the end losing more effectiveness during the process. 

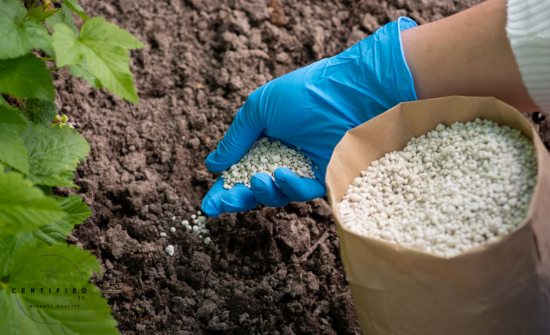
Reduce Synthetic Inputs

Many chemical fertilizers—especially those high in phosphorus—inhibit mycorrhizal colonization. Instead, focus on organic soil amendments, compost teas, and natural fertilizers that support fungal activity rather than suppress it. Look into things like Bokashi and IMO to be your go to instead of a synthetic chemical. 

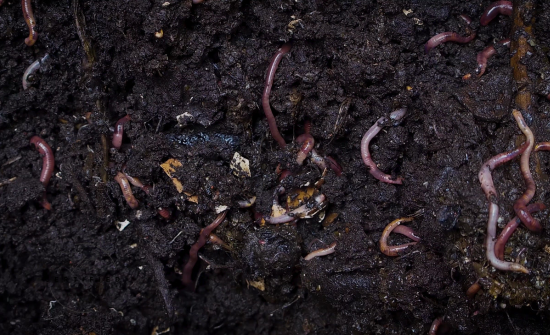
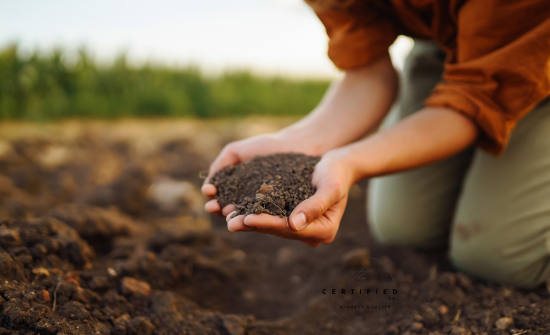
Maintain Soil Moisture and Organic Matter

Healthy soil rich in organic matter supports fungal growth. Using mulches, compost, and organic amendments helps fungi thrive while improving soil water retention and aeration.

The Future of Mycorrhizal Fungi in Cannabis Cultivation

As cannabis cultivation shifts toward more sustainable and organic methods, mycorrhizal fungi will play an increasingly important role in eco-friendly farming. Research is continuously uncovering new benefits of fungal networks, from increasing terpene profiles in cannabis flowers to enhancing plant immunity against environmental stress.

Harnessing the Power of Mycorrhizal Fungi

By integrating mycorrhizal fungi into cannabis cultivation, growers can build more resilient ecosystems, reduce their reliance on external inputs, and produce higher-quality, terpene-rich cannabis with a smaller environmental footprint.

Posted on

Sustainable Cannabis Cultivation: Eco-Friendly Practices

Sustainable Cannabis Cultivation

As the cannabis industry grows, so does its environmental impact. Energy-intensive indoor grows, water-hungry outdoor farms, and wasteful practices can take a toll on natural resources and farmers’ pockets. But this doesn’t have to be the case. By adopting sustainable cultivation methods, cannabis growers can reduce their carbon footprint while improving soil health, conserving water, and maintaining long-term profitability.

Today, we will explore key sustainability practices—from regenerative farming techniques to energy-efficient technologies—that every cannabis cultivator can implement. Whether you are a home grower or managing a large-scale operation, these eco-friendly strategies will help you cultivate cannabis responsibly while ensuring a healthier planet for future generations.

Our intent is for all growers to consider their environments more deeply. To figure out how they can increase productivity and efficiency but also reduce inputs and protect top-layer soils from erosion.

Why Sustainability Matters in Cannabis Cultivation

Traditional cannabis cultivation often requires excessive inputs, including synthetic fertilizers, high-intensity lighting, and continuous irrigation. Even organic farmers tend to be wasteful with inputs at times. Not knowing how adverse too much of a good thing can be. These factors contribute to soil degradation, water scarcity, and high energy consumption. However, the cannabis industry has the unique opportunity to be at the forefront of sustainable agricultural innovation. 

Simply due to the ease at which cannabis grows compared to other crops, farmers could drastically change techniques to improve overall sustainability practices. Saving money is truly a massive motivator for those who have never considered a more sustainable approach. Growers and farmers of larger operations are always running tight margins on crops. Sustainability really helps widen that bottom line for farmers. A serious benefit that they cannot ignore.

Sustainable Cannabis Cultivation

Regenerative Farming: Restoring Soil Health

Regenerative agriculture goes beyond sustainability—it actively improves soil structure, enhances microbial life, and builds organic matter. This approach aligns with the principles of soil microbiology outlined in Teaming with Microbes, emphasising the importance of the soil food web in nutrient cycling and plant resilience. We have written on this topic in various different blogs. So feel free to read more on this here

Most already participate in creating sustainable environments on their farms but are just not aware of how to incorporate all the factors. Many are doing the following in silos… But consider doing the following practices altogether.

  • Composting: Convert organic waste into nutrient-rich compost to enrich your soil. One of the most cost-effective methods for organic farmers to remain independent from extra nutrient costs. Knowing what type of compost, how to handle it and how to use it is just as important as having a massive compost heap. 
  • Cover Crops: Plant legumes, clover, or rye to prevent erosion, fix nitrogen, and add organic matter. Cover crops help prevent water loss on those hectic sunny days by providing shade to the topsoil. It also replenishes the soil with nutrients. Growing and chopping cover crops have truly changed the game. Cover cropping is also one of the most effective methods to prevent soil erosion. 
  • No-Till Farming: Avoid disturbing the soil to maintain microbial ecosystems and improve soil structure. We wrote about this in our Soil Food Web blog. But essentially not plowing the ground allows for life to thrive underneath the surface of the soil. Improving ecosystems and microbial and fungal networks. That all benefits the farmer. From reduction in watering to less nutrient input required. Establishing a no-till ecosystem can take time but is truly worth it.
  • Crop Rotation: Rotate cannabis with other crops to prevent nutrient depletion and break pest cycles. So many growers get into cannabis and do exactly what previous older-generation growers and farmers do. Monocropping. Causing extreme damage to soil, and ecosystems and increasing pests and diseases. It’s important to rotate crops. When out of season, consider growing other things too. During cannabis season, grow more than just cannabis. 
Sustainable Cannabis Cultivation

Water Conservation: Using Every Drop Wisely

Water is a precious resource, particularly in regions prone to drought. Sustainable cannabis cultivation must prioritise efficient water management to minimise waste and maintain soil health. Something that can be easily achieved with good effort and planning. Water is of the cause of utmost importance, similar to sunlight. Often times growers don’t plan or think about water treatment, and management. This leads to many other issues in the operation. Things like: too little water reserves, poor quality water and many wasted litres

  • Drip Irrigation: Delivers water directly to plant roots, reducing evaporation and runoff. Of course, it can come with its drawbacks. Driplines can clog up and break if exposed to too much direct sunlight etc. So maintenance of this becomes a priority. Thankfully it is such a cheap method to install for most growers. This saves lots of water. 
  • Rainwater Harvesting: Collect and store rainwater to supplement irrigation. This can turn out to be more expensive from the get-go for those who don’t already have some type of gutter system. Often jo-jo tanks are set by the gutter to collect rainwater, it is then filtered or irrigated straight to the plants.

A South African cannabis farm reduced its water consumption by 30% by implementing drip irrigation and rainwater harvesting, leading to improved plant health and increased yields.

Sustainable Cannabis Cultivation

Energy Efficiency: Powering Sustainable Cultivation

Indoor cannabis cultivation is energy-intensive due to artificial lighting, climate control systems, and ventilation. However, advancements in energy-efficient technologies make it possible to reduce electricity consumption without compromising plant health. The cost of energy can easily become an indoor grower’s nightmare. If you are growing with traditional HPS or Metal Halide lighting systems, you are paying an expensive electricity bill. Most of the time these light systems require extra things like cooling and dehumidifying of the spaces putting extra cost on everything. 

There are some ways to try and be more sustainable when growing indoors. Some growers consider the following:

  • LED Lighting: Use LEDs instead of high-pressure sodium (HPS) lights to reduce energy usage and heat output. Not only is LED technology less power intensive, but it also provides a more accurate spectrum output. They can be very expensive to get, but in the long run, will save money and energy
  • Renewable Energy Sources: Installing solar panels can help reduce dependence on the grid. It is however important to note that this is also a very expensive solution and can often not be met by an average grower. To put an entire grow operation off the grid is a feat but can be worth it on a more commercial operation. Or even just supplementing the fans and extraction units with it could help so much as those are things that run all the time.

Environmental Controls: Automate temperature, humidity, and CO2 levels for optimized energy use. Precision agriculture has become so popular in all niches. Cannabis cultivation is no exception. You can find amazing technology that can assist in environmental controls from switches to sensors that can automatically put equipment in optimal conditions. We have seen reports of efficiency increase by 65% due to such technology integrations.

Waste Reduction: Turning Byproducts into Resources

Cannabis cultivation generates significant plant waste, from trimmings to packaging materials. Rather than contributing to landfill waste, growers can implement sustainable waste management strategies. Recycling or reusing things in and around the growing areas will help increase sustainability practices. 

We have written in the past on Korean Natural Farming, and how it can be incorporated into your arsenal. All of these practices are very sustainable to the environment and can cost very little to the farmer. Making Fermented Plant juices from waste plant material is the best method to reduce direct plant waste but also bring maximum benefits to the plants. Reducing costs to the farmer too. Other cool waste fermentations can also be used to make a positive impact on the soil health and water retention of the operation. Culturing Indigenous microorganisms (IMO), and fermenting Oriental herbal Nutrients, can all help reduce water requirements, improve soil health and increase the effectiveness of a no-till farming technique.

Sustainable Cannabis Cultivation

Overcoming Challenges in Sustainable Cannabis Farming

While the benefits of sustainability are clear, many growers face challenges when trying to implement eco-friendly practices.

  • High Initial Costs: Renewable energy systems and water-efficient technologies require upfront investment. Most newer growers struggle to meet this capital requirement which forces them to stick with less sustainable practices, like we mentioned with the lighting.
  • Knowledge Gaps: There are so many who ignore the idea of being sustainable but there are just as many that are ignorant to it. The more we can increase farmers’ and grower’s knowledge of technology, and growing techniques, the better informed they become leading to more conscious growing outputs. Some growers are already doing sustainable farming practices but they are not doing it consistently enough to see the benefits.

So what can you do?

  • Start small—adopt one sustainable practice at a time. Understand your methodologies and learn to stay consistent.
  • Look into renewable energies. Finding a capital solution by accessing eco-friendly agricultural grants and financial aids can also help. We know that the Landbank of South Africa offers some type of financial aid to those looking to improve their farming by installing solar.
  • Join grower communities to exchange knowledge and experiences. Interact with more people. You will find that there is some great advice around the corner to make your cultivation journey so much better. You are not alone in your challenges, always remember that.
Sustainable Cannabis Cultivation

Growing Green for a Better Future

Sustainability in cannabis cultivation isn’t just a trend—it’s a necessity for long-term environmental and economic success. By implementing regenerative farming, conserving water, reducing energy consumption, and minimising waste, growers can cultivate high-quality cannabis while protecting the planet.

Every small step makes a difference. Whether you start by composting plant waste, switching to LED lighting, or investing in renewable energy, you’re contributing to a greener, more responsible industry. 

Posted on

The Power of Micronutrients in Cannabis Cultivation

Micronutrients for cannabis plant

Last week, we explored the essentials of watering cannabis and managing macronutrients like nitrogen, phosphorus, and potassium (NPK). This week, we’re delving deeper into an often-overlooked but equally vital aspect of cannabis nutrition: micronutrients. While required in smaller amounts, micronutrients are crucial for a plant’s metabolic processes, structural development, and cannabinoid production.

In this blog, we’ll highlight the key micronutrients your cannabis plants need, how they function, and practical tips to ensure your plants get the right balance for optimal growth and yields.

Organic or Synthetic Nutrients

What Are Micronutrients, and Why Do They Matter?

Micronutrients are trace elements that cannabis plants require in small quantities but are essential for overall health and development. Unlike macronutrients, which support bulk growth, micronutrients play a regulatory role in processes like enzyme activation, photosynthesis, and stress resistance.

Key Micronutrients for Cannabis:

Iron (Fe): Vital for chlorophyll synthesis and energy transfer.

Zinc (Zn): Essential for hormone production and enzyme activity.

Manganese (Mn): Supports photosynthesis and nitrogen metabolism.

Copper (Cu): Aids in lignin synthesis and overall structural integrity.

Boron (B): Critical for cell wall formation and reproductive growth.

Molybdenum (Mo): Helps convert nitrogen into usable forms.

While deficiencies in these elements can lead to stunted growth, yellowing leaves, or poor bud formation, proper management ensures your plants thrive.

Signs of Micronutrient Deficiency in Cannabis

Micronutrient deficiencies can be subtle at first but quickly impact plant health if left unaddressed. Here’s how to identify common deficiencies:

Iron Deficiency: Yellowing between leaf veins (chlorosis), especially in new growth.

Zinc Deficiency: Stunted growth, smaller leaves, and distorted bud development.

Manganese Deficiency: Yellow or brown spots on leaves and slowed photosynthesis.

Copper Deficiency: Dark green leaves with tips turning purple or wilting.

Boron Deficiency: Deformed or brittle leaves and slow stem growth.

Sources of Micronutrients: Organic and Synthetic Options

Ensuring an adequate supply of micronutrients can be achieved through organic amendments, synthetic fertilisers, or foliar feeding. Here are some options to consider:

Organic or Synthetic Nutrients

Organic Sources:

Compost and Worm Castings: Rich in trace elements and beneficial microbes.

Seaweed Extracts: Provide a natural source of micronutrients like zinc and boron.

Rock Dust: Contains iron, manganese, and other minerals.

Fish Emulsion: Includes trace amounts of molybdenum and copper.

Synthetic Micronutrient Supplements:

Chelated micronutrient blends ensure better absorption in varying soil pH conditions.

Use sparingly to avoid over-fertilization, which can lead to toxicity.

Foliar Feeding:

Quick absorption of micronutrients through the leaves is ideal for addressing deficiencies rapidly.

Optimising Micronutrient Absorption

Certain factors can limit their availability even if your soil or fertiliser contains adequate micronutrients. Understanding these conditions is key to optimising absorption.

Organic or Synthetic Nutrients

Factors Influencing Micronutrient Uptake:

Soil pH: Micronutrients are most bioavailable in slightly acidic soils (pH 6.0–6.5). Alkaline soils often lock out iron, zinc, and manganese.

Soil Drainage: Poor drainage leads to waterlogging, reducing oxygen and microbial activity, which are essential for nutrient uptake.

Compaction: Hard, compacted soil restricts root growth and limits access to nutrients.

To maximize micronutrient absorption:

Regularly monitor and adjust pH levels.

Improve soil structure with amendments like perlite or coco coir.

Incorporate humic acid to enhance nutrient availability and root development.

Pro Tips for Flowering Nutrition:

Add micronutrient boosters during the flowering phase for optimal bud production.

Use organic top-dressings like rock dust or bone meal for a slow-release effect.

Ensure your watering routine supports even distribution of nutrients.

Balancing Micronutrients for Cannabis Success

While micronutrients are essential, over-supplying them can lead to toxicity, which harms your plants as much as deficiencies do. For example, excess copper can cause leaf burn, while too much boron can disrupt root development. Striking the right balance is critical.

Tips for Micronutrient Balance:

Start with a soil test to understand your starting nutrient levels.

Use micronutrient-specific fertilizers only when deficiencies are evident.

Rotate between organic amendments and synthetic supplements for a balanced approach.

Understanding Soil

Final Thoughts: Small Elements, Big Impact

Micronutrients may be needed in small amounts, but their impact on cannabis health and yield is profound. By ensuring your plants receive a balanced diet of iron, zinc, manganese, and other trace elements, you can elevate their growth, potency, and resilience.

As you continue refining your nutrient management practices, remember that attention to detail in these small elements can lead to big rewards—healthier plants, richer harvests, and a thriving garden you can be proud of.

Posted on

Watering Cannabis and Managing Nutrients

watering cannabis and managing nutrients

Over the past weeks, we’ve covered a wide range of foundational topics for cultivating thriving cannabis plants, from composting to plant training. This week, we’re honing in on a crucial part of the cultivation process: watering and nutrient management. Proper watering and a balanced nutrient approach are essential for promoting healthy growth, enhancing cannabinoid yield, and achieving optimal plant health.

Let’s dive into best practices for watering cannabis and managing nutrients, from understanding NPK ratios to maximizing the benefits of organic fertilizers and biostimulants like humic acid.

The Essentials of Cannabis Watering: Striking the Right Balance

Water is the lifeline of your cannabis plants, but too much or too little can hinder their growth. Overwatering is a common mistake, leading to root rot and nutrient lockout, while underwatering stresses the plants, limiting their nutrient uptake and development. I normally will say to guys just starting. To lift their pots and feel the weight. Do this before watering and after watering. This will give you an indication of the amount of water content present in the pot. When you check upthe next day or two on your plants when you lift the pots up you will notice the difference in weight which would translat back to the amount of water the plants absorbed over the period of time.

watering cannabis and managing nutrients

Watering Best Practices:

Frequency and Amount: The amount of water needed depends on factors like growth stage, plant size, and environment. As a general rule, water deeply but less frequently, allowing the soil to dry slightly between waterings.

Monitor Drainage: Cannabis plants require well-drained soil to prevent waterlogging. Ensure your pots have sufficient drainage and consider using a soil mix that retains moisture without becoming waterlogged.

pH Levels: Maintain a water pH of 6.0–6.5 for soil-grown plants and 5.5–6.0 for hydroponics. Adjusting pH as needed prevents nutrient lockout and ensures your plants can absorb essential minerals efficiently. In the future we will dive into Ph more. I have written on this topic in my ‘ pH doesn’t matter’ blog.

Managing Nutrients: The NPK Foundation

Nitrogen (N), Phosphorus (P), and Potassium (K)—collectively known as NPK—are the primary nutrients cannabis plants need throughout their growth cycle. Each element plays a specific role:

Nitrogen: Crucial for leaf and stem development, especially during the vegetative stage. Adequate nitrogen supports lush, green foliage that maximizes photosynthesis. Most times we are over feeding nitrogen at the incorrect times of the plant’s growth. To ensure you do not over feed. A good rule of thumb is always, Less is more. So, by halving your Nitrogen inputs you can ensure that the plants still receive the crucial Nitrogen they require.

Phosphorus: Supports root development and is vital during the flowering stage for energy transfer and bud formation. Very Airy flowers are often a result of a lack of Phosphorus inputs. During the flowering period, growers need to focus on ensuring that phosphorus is getting to the plant as intended.

Potassium: Enhances overall plant health, helping with water absorption, nutrient transport, and disease resistance.

During the vegetative phase, cannabis requires a higher nitrogen concentration to support rapid leaf and stem growth. When shifting to flowering, reduce nitrogen and increase phosphorus and potassium for optimal bud development and potency. Some growers like to flush nutrients out of their pots to ensure that no excess nitrogen nutrient remains present during the transition period of the plants.

watering cannabis and managing nutrients

Enhancing Nutrient Uptake with Humic Acids and Biostimulants

Humic acid is a powerful biostimulant that promotes nutrient uptake and enhances soil structure. Studies show that humic acid boosts microbial activity in the soil, making nutrients more available to plant roots and also improving nutrient absorption efficiency, allowing plants to make the most of each feeding.

Biostimulants can be added as part of a regular nutrient regimen or mixed into the soil before planting. For cannabis, humic acid supplements encourage stronger roots, faster growth, and greater tolerance to environmental stressors.

Organic Fertilisers: Sustainable Choices for Healthier Plants

Organic fertilisers provide essential nutrients slowly, enhancing soil health over time and supporting beneficial microbial activity. A recent study found that organic fertilizers improve overall nutrient balance, especially during the flowering stage, where they enhance cannabinoid production and bud density organic fertiliser Options for Cannabis:

Compost and Manure: These are high in organic matter and beneficial microbes, gradually releasing nutrients. Please make sure to read last weeks Composting blog to learn more about how to handle raw manure and more.

Fish Emulsion: Rich in nitrogen, it is especially beneficial during the vegetative stage.

Seaweed: Another amazing source of Nitrogen for plants as well as hormones to stimulate growth.

Bone Meal: A source of phosphorus for root development and flowering.

Combining organic fertilisers with humic acid creates an environment that supports robust, resilient plants. Organic amendments also provide a long-lasting nutrient reservoir, reducing the need for frequent feedings.

Many of these including the Natural Farming techniques we have previously discussed are all valid inputs to achieve healthy organic flowers.

Watering and Feeding Schedule: Tips for Consistency

Creating a consistent schedule helps you avoid over- or under-watering and ensures your plants receive balanced nutrients throughout their life cycle.

Many growers rely on an automatic watering system, some have drip lines and others have flood and drain systems. Even thought this will take the work out of watering plants. It still requires growers to be attentive and aware of drip rates, nutrient mixtures and potential leaks that can cause damage. Just looking at the agricultural industry as a whole will unlock any and all types of irrigation for you. So if you wish to go this route, you need to just take some time. Plan everything correctly and go for it. Irrigation systems are often very simple. Opening and closing of valves can easily be implemented to manually control the flow of fertigation. 

watering cannabis and managing nutrients

Suggested Schedule:

Vegetative Stage: Feed plants every 1–2 weeks with a balanced NPK formula, keeping nitrogen levels high. Water deeply, allowing the soil to dry between sessions. Monitor the soil moisture, during this period plants tend to take up the water a little bit faster, generally, there is also more intense sun during this stage.

Flowering Stage: Shift to a lower nitrogen mix with increased phosphorus and potassium. Add organic fertilisers to enhance soil health and cannabinoid production, supplementing with humic acid biweekly for nutrient uptake. Along with Humic acids are many other biostimulants that can add great benefit to your flowering cycle. It is important to note, however, that taking things too far at this point in time will drastically change your plant’s flowers. Be mindful of the extras you add during this time.  

Final Thoughts: Optimize Watering and Nutrients for Vibrant Cannabis Growth

Watering cannabis and managing nutrients effectively is an art that takes practice. By understanding NPK ratios, incorporating organic fertilisers, and leveraging biostimulants like humic acid, you can create an environment where your cannabis plants thrive. Consistent attention to watering and nutrient balance will lead to healthier plants, higher cannabinoid yields, and ultimately, a successful harvest.

Posted on

Composting, How it works

Composting, how it works

In the past weeks, we’ve delved into everything from propagation techniques to plant training strategies. This week, as your cannabis plants continue to grow, it’s time to focus on one of the foundational practices that can significantly enhance their health and yield: composting. Composting is a simple, natural way to enrich your soil, and it’s an investment that pays off over time. With methods like hot composting, Hugelkultur, and bokashi, you have several options to suit your needs, each bringing unique benefits to your cannabis cultivation.

While creating compost may seem straightforward, it can become time-consuming on a larger scale without efficient tools. Let’s explore how to get started with composting, the different techniques available, and the best ways to manage raw materials for a successful composting process that supports your cannabis garden.

composting, how it works

The Basics of Composting: Transforming Waste into Vital Nutrients

Composting is a natural process where organic materials decompose to form a nutrient-rich substance that resembles humus. Through aerobic decomposition, microorganisms break down green (nitrogen-rich) and brown (carbon-rich) materials, turning waste into compost. This final product, packed with microbes and essential nutrients, enhances soil structure, aids water retention, and stimulates root growth—perfect for cannabis cultivation.

Hot composting is a highly efficient way to create compost. This method relies on maintaining a high temperature within the compost pile to speed up decomposition. Hot composting, as described in your resources, can yield garden-ready compost in as little as three months if managed well. This quick turnaround makes it ideal for cannabis growers who need a steady supply of compost.

Hot Composting: Quick, Effective, and Full of Nutrients

Though labour-intensive, hot composting is one of the fastest and most effective methods. Here’s how to get started:

Layer materials: Begin with a foundation of brown materials (like straw or dried leaves), alternating layers of greens (like vegetable scraps or fresh grass clippings) with browns to maintain a balanced carbon-to-nitrogen ratio. Make sure to keep the Browns material to a small size. Having large wood pieces will slow the quick composting down. So do your best to have twigs and sticks as small as possible. 

Maintain moisture: The pile should be moist but not soaking; aim for the feel of a wrung-out sponge. I always say, to start by adding water to the piles as you build them. Not too much but wet everything as you build your brown layers.

Incorporate some dirt or Soil: Adding in a small amount of dirt with your brown layers will help with moisture but also beef up your compost pile. Make sure that the dirt does not exceed 10% of the total browns. 

Monitor temperature: Use a compost thermometer to ensure the pile reaches around 55–60°C. When it hits this range, turn the pile to aerate it and regulate heat.

Turn regularly: Flip the pile each time it hits the ideal temperature range, usually every few days.

By following these steps, you’ll have nutrient-rich compost in 2–3 weeks, perfect for the soil. Or even as a top dress for your growing plants. More advanced growers will use this compost in their compost teas, ensuring the bioavailability of the nutrients. 

composting, how it works

Hugelkultur: Long-Lasting Nutrients and Moisture Retention

Hugelkultur is a unique form of composting that’s perfect for cannabis gardens requiring long-lasting, slow-releasing nutrients. Originating from German permaculture, Hugelkultur involves burying large logs or branches at the base of a planting bed, which slowly decomposes over time. This decomposition provides a continuous source of nutrients and helps retain moisture, reducing the need for frequent watering.

Over the years, the sophistication of Hugelkultur’s have gotten better. Consider not only adding large wood pieces at the bottom but also some stones too. Over time this will also provide minerals to the soil as it breaks down slowly over time. The higher up the Hugelkultur is built the smaller the materials are that make up each layer. In the end, it will be a little mound that will be able to sustain life perpetually over time with very minimal inputs. 

Composting, how it works

This method is ideal for outdoor cannabis growers who want a sustainable, low-maintenance approach to soil enrichment. As the wood breaks down, it becomes a natural sponge, holding water and releasing nutrients slowly—making it an excellent foundation for cannabis plants that require consistent moisture and nutrient availability.

Bokashi: A Fermentation-Based Approach

Bokashi composting is an anaerobic (oxygen-free) fermentation process, perfect for indoor composting or small spaces. By adding a microbial inoculant, typically a mixture of lactic acid bacteria, yeast, and other beneficial microbes, bokashi breaks down organic material without odour. This method is ideal for home growers who need a compact solution for composting kitchen scraps.

The fermented material from bokashi can be added to your compost pile or buried directly in the soil. It speeds up the composting process and enriches the soil, especially beneficial for cannabis roots that thrive in a microbe-rich environment. Bokashi’s compact process also makes it accessible for those with limited space. You can find various types of Bokashi compost bins for home use online. Building one can be simple too. The main thing is to use an effective microbial solution to break down your scraps. Also, make sure that you can drain liquid strain from the Bin. this will be gold for Compost teas too.

Composting, how it works

Fish Hydrolysate: A Nutrient-Rich Boost for Your Cannabis

Fish hydrolysate, a liquid fertilizer made from whole fish or fish waste, is another excellent compost addition. It’s rich in nitrogen, amino acids, and minerals that support robust growth and flowering in cannabis plants. Unlike traditional fish emulsion, fish hydrolysate is cold-processed, retaining more nutrients.

However, making this is not really ideal for your neighbours and the smell can be overwhelming. So please be mindful if you are going to attempt this. Whole fish with a little bit of water crushed, mixed with unsulphured molasses. Good luck.

For cannabis growers, adding fish hydrolysate to compost or directly to soil can enhance microbial activity and enrich nutrient levels. Just remember that fish products can attract pests, so take care when applying them outdoors. You can also look at buying quality fish hydrolysate from reputable brands already established in our country.

Handling Raw Manure: High in Nutrients, But Use with Care

Raw manure is a powerful nitrogen source but requires careful handling due to potential pathogens and its tendency to burn plants if applied fresh. When composted properly, manure can be transformed into a safe, effective fertilizer that’s perfect for cannabis.

If this is the route you are going. Ensure that you pile up all the manure together in a big enough pile for it to generate heat. At least a cubic meter in height. Make sure, just like with the quick hot compost that the manure is not too wet, if it is add some dirty, straw or dry leaves to it. Monitoring the pile will be important so having the tools to measure the temperature. Unlike with the Hot compost pile, you need to kill pathogens so avoid touching it with your hands and have a thermometer at hand. Once the pile reaches the ideal temperature, start turning it. Once the entire pile has been turned and left to reach the temperature, has no odor and is blackish in colour it will be ready to use in your gardens.

Composting, How it works

Making Compost Work for Your Cannabis Garden

From hot composting to the innovative Hugelkultur and bokashi methods, composting offers cannabis growers a sustainable, effective way to boost soil health. Creating your own compost is simple, but as your scale increases, it can become time-consuming without efficient tools or systems. However, the results— richer soil, healthier roots, and more robust plants—are well worth the investment.

Taking the time to understand and implement these composting methods is a gift to your cannabis garden. Not only will it enhance the growth of your plants, but it also brings a deep sense of connection to the natural processes that sustain them.

Posted on

Integrated Pest Management in a nutshell

integrated pest management

Last week, we explored Korean Natural Farming (KNF) techniques, including how to make Effective Microbe solutions (EM-1) and fermented plant juices. Now, let’s dive into how these methods, along with an effective Integrated Pest Management (IPM) system, can protect your cannabis plants from pests naturally.

What is Integrated Pest Management (IPM) for Cannabis?

Simply put, Integrated Pest Management (IPM) is a proactive, eco-friendly approach to pest control that revolves around protecting your cannabis plants throughout their growing period. Rather than relying on harsh chemicals, IPM combines various strategies, including companion planting, beneficial insects, natural sprays, and preventive measures. This holistic system prioritizes plant health, reduces environmental damage, and helps build long-term resilience in your garden.

Now don’t get me wrong. Some farmers today still rely on the use of pesticides and harsh insecticides in order to solve their pest issues. As effective as they are, we have learnt and have seen the damaging effects on the water, soil and health of people this has had. So please pardon me that I don’t discuss things like Pyrol, Eco oil SK etc. I am not against the use of these compounds as I have used them in the past and still make use of some of them when I really need to. An example of this would be Potassium Scilicate. An inorganic compound that is apart of my IPM and I will explain why later.

Integrated Pest Management

Getting Started with Companion Planting: The Foundation of IPM

One of the simplest and most effective ways to begin your IPM journey is by incorporating companion plants. Cannabis, while valuable to humans, is also highly attractive to pests. Companion planting can help deter harmful insects while attracting beneficial ones. Your garden will thrive once you have a balance in nature. So with this, there needs to be a sense of awareness from the farmer that there will be pests but there will also be predators. And having a balance is what we are aiming for. 

Popular companion plants for cannabis include:

Marigolds: Known to repel nematodes and aphids.
Garlic and onions: Their strong scent drives away many insects.
Basil and mint: These herbs repel flies and mosquitoes while enhancing flavor when grown near cannabis.
Chamomile and lemon balm: Attracts beneficial pollinators while repelling pests like aphids.

These plants not only assist with pest control but can also be used to create fermented plant juices or Oriental Herbal Nutrients (OHN) for plant health, utilising your EM-1 solutions.

integrated Pest Management

Introducing Natural Predators: Your Garden’s Tiny Guardians

While companion planting lays a solid foundation, introducing beneficial insects can take your IPM strategy to the next level. These insects act as your garden’s natural pest controllers, maintaining a balanced ecosystem. Here are a few garden-friendly bugs you’ll want to invite:

Ladybugs: These beetles are aphid-eating machines.
Lacewings: Both adults and larvae feed on a variety of soft-bodied pests like caterpillars and aphids.
Praying Mantises: These predators will consume just about any insect they can catch, including larger pests.
Parasitic Wasps: Though tiny, these wasps play a crucial role in pest control by laying their eggs inside destructive insects.

To ensure these beneficial insects stick around, provide them with food, water, and shelter. Companion plants like chamomile and basil create the perfect habitat for these valuable predators. Another solution can also be to buy them as you need or see fit. The predator insect market has boomed over the last 5 years opening up once an agricultural elite IPM treatment to the average Joe like you and I. Companies like Koppert have done an amazing job by even offering pheromones for specific insect trapping too.

integrated pest management

Preventive Measures: Building a Strong Defense

Prevention is key when it comes to pest management. It sometimes can seem extreme to take action on something that doesn’t require any work. But when it comes to your cannabis. This approach is best. Just the basics in garden ethics can also be considered being proactive.

Proper Sanitation: Regularly clean your growing area, removing dead leaves, debris, and any infected plants to reduce the risk of pest infestations. A clean grow area will do more than just look good to the eye. It will help reduce risk of mould and diseases.

Regular Inspections: Make daily inspections a habit. Catching pests early can prevent a full-scale infestation. But also take note. That seeing One or two of something doesn’t always call for an intervention. So while inspecting be aware of the sizes of the things you see and learn what is too much. You don’t want to wait till things are overboard before you intevine. 

Quarantine New Plants: Always quarantine any new plants before introducing them to your main garden to avoid cross-contamination. This is something you must consider when bringing clones in from a new space to plants already in your space. It is normally advised to seperate them and treat the new plants before bringing them into the fold.

Natural Sprays and Solutions: These are usually things that can take long to take effect compared to an insecticide like Pyrol. But consider adding an amazing KNF solution called JADAM wetting agent to your solutions of oriental herbal nutrients. Jadam as been proven to suffocate insects and because of its properties allows for better application of all sprays and solutions.

integrated pest management

If pests do make an appearance, you can fight back with natural solutions that are safe for both your plants and the environment. Here are a few simple DIY recipes you can try:

Neem Oil Spray: Mix 1 teaspoon of neem oil and ½ teaspoon of liquid soap with 1 quart of warm water. This all-purpose spray combats a wide range of pests like aphids, spider mites, and whiteflies.

Garlic-Pepper Spray: Blend 2 hot peppers and 1 whole bulb of garlic with 1 quart of water. Strain and spray this mixture to deter insects like caterpillars, aphids, and beetles.

Diatomaceous Earth: This powder, made from fossilized algae, works by physically damaging the exoskeletons of crawling insects. Dust it around your plants for effective pest control.

AQ sf (Ampelomyces Quisqualis): an Indigenous fungal isolate to South Africa, and a hyper parasite to the common Powdery Mildew. Mixed in with a water or JADAM solution.

Potassium Silicate: Fills the cellular gaps within the plant wall structure, allowing for a more robust in-the-wind plant as well as a plant with tougher skin for insects to bite into. As well as making it extremely undesirable for fungus to thrive, so it also takes care of powdery mildew.

Creating Your IPM Schedule: Consistency is Key

A successful IPM system requires regular maintenance and monitoring. You can easily avoid massive issues by just doing the following:

Daily: Perform visual inspections of your plants for any signs of pests or disease.

Weekly: Apply preventive sprays, rotating between different natural solutions to avoid resistance.

Bi-weekly: If you’re using beneficial insects, release them into your garden at this frequency.

Monthly: Conduct a deep clean of your grow room or garden area to reduce pest hiding spots.

Integrated Pest Management is more than just controlling pests—it’s about building a sustainable ecosystem that promotes plant health and resilience. Your Will will be tested as a grower every season. Pests and diseases are often what collapse what seemed to be a perfect grow. So take the time to develop your IPM based on the previous season’s experience. And if you are brand new, take time to go into your garden and assess what is going on. Are there any issues already and what can you do to take measures against it now before you grow your cannabis in the space? A strong IPM strategy not only ensures a bountiful harvest today but sets you up for success in future growing seasons.

Posted on

Fermented Plant and Fruit Juice (FPJ and FFJ)

Fermented Plant & Fruit Juice

As promised, this week I willl be giving some awesome recipes that you can make at home to incorporate into your fertigation regimint and start a full Korean Natural Farming Journey. Before I can just list down a bunch of recipes we need to continue some of the discussion on KNF, so if you havent checked out last weeks blog on Korean Natural Farming, I highly suggest you start there. And for those that haven’t been following along, these blogs are apart of a larger ‘How to Grow’ series in which I will be providing insightful concepts to consider during this growing season.

The first spring rain has fallen this week. Such an amazing time for us Growers. The first rain does more than just bring in the season’s grow metaphorically. The first rain for the season has been proven to activate life and the soil food web as a whole. Many bacteria and fungi will lay dormant and wait for the rain. So when people usually ask me when I plant I normally say after the first rain. When considering Soil conditioning as a whole. The first rain really produces and activates all that you have prepped in your soil prior. The mineral content from the rain is usually exactly what you were lacking… So embrace this first rain. 

Fermented Plant & Fruit Juice (FPJ and FFJ)

FPJ and FFJ are natural fertilizers made from the fermentation of specific plant materials to feed growing plants during different stages of their life cycles. FPJs are made from young vigorous growing plants with lots of growth hormones and enzymes to feed vegging plants. While FFJs are made from the fruits of plants for their natural sugars, amino acids, and plant growth regulating enzymes and hormones to feed flowering plants. The process involves collecting fresh and healthy plant parts, such as leaves, stems, shoots and fruits, and fermenting them to extract the beneficial properties into a water-soluble plant available solution.

It is extremely simple yet so effective. All you need is brown sugar, a decent glass jar with a big opening(which makes things easier), a scale and some basic kitchen utensils. Oh, and a cloth or breathable towel to cover the glass with.

Fermented Plant & Fruit Juice (FPJ and FFJ)

Collecting Plant Material

For FPJ gather fresh and healthy plants early in the morning when morning dew is still present. Look for things like weeds that grow big fast and are tolerant to a wide range of temperatures or weather patterns like floods or droughts. The enzymes, hormones and microbial life in and on these plants helping them thrive is what we are after. When collecting plant material, remember that young shoots have the highest levels of these plant growth hormones. A few plants that can be used here in South Africa, Alfalfa, comfrey, Gooseberry, and Banana. In the picture above I used clover, it was the over crop under the canopy that grew to thick. It’s essential to use plants that are free from diseases and pests and to not wash the microbial life off the plant material.

FFJs are made the same way as FPJs but it may be a little harder to come by natural growing fruit in your area. Do a little research on the nutrient density of different fruits to see what fruits or veggies you can grow in the garden that will make good natural fertilizers. Using craps of fruits are just as effective. Banana peels, watermelon rind etc… Ensure that you make your FFJ according to the nutrient boost you wish to give your plants.  The doing your research part is so important. You will also be surprised how many veg and fruit you already have going to waste that could be used to ferment for your plants and garden as a whole. 

Chopping and Mixing

Chop the collected plant material into smaller pieces for more surface area coverage then mix with equal parts by weight brown sugar. This helps in breaking down the cell wall of the plant material creating osmotic pressure and releasing juices packed full of the plants beneficial properties. I have seen a method, using a 20L plastic bucket a few holes at the bottom.You chop and mix your plant material or fruits and once you place it in the bucket you add a brick ontop of it. This will apply pressure and also allow the juices to separate out of the bucket.

Fermentation

Place the chopped plant material/brown sugar mix in a container and cover with a sugar cap. Then cover container loosely with something breathable like a clean shirt, rag or paper towel to keep bugs out. Allow it to undergo natural fermentation. This process encourages the growth of beneficial microorganisms and the breakdown of plant materials.

Here are some things I would recommend you ferment for your garden. Note, that there are different ways to skin a cat. Each one of these things have its own benefits but can also be used in synergy with other ferments. 

Alfalfa – Unlocking nutrients and growth hormones such as Triacontanol which can improve growth, yield, root formation, photosynthesis, uptake of water and nutrients, nitrogen-fixation and enzyme activities.

Bamboo/young cannabis plants –  rich in nutrients, can improve soil conditions and possess many medicinal properties. Due to the fast-growing nature of young plants, they are often high in auxins and cytokines, hormones involved with growth and vigour. 

Lactic Acid Bacteria – Amazing for soil conditioning, plant health and overall immune of the plant.

Dilution and Application

Before using, dilute FPJ or FFJ with water. Typically, a dilution ratio of 1:500 or 1:1000 is recommended. This means mixing 1 part FPJ or FFJ with 500 or 1000 parts water (1ml per L / 3.7ml per gal or 2ml per L / 7.4 ml per gal). After 6 months use at a higher dilution rate. The diluted FPJ or FFJ can be applied as a foliar spray or added to the soil to provide readily available food to plants and microbial life.

Fermented Plant & Fruit Juice (FPJ and FFJ)

Other Fermentations and Recipes.

Some ferments focus purely on fungal growth. Similar to our discussion last week on IMO. Cannabis thrives in both bacteria and fungal soil. So to have a balance is of utmost importance. Here are other things you can consider making to increase your fungal count in the soil. Corn Sprouted Tea, Bokashi Bran and Compost tea without molasses, also will increase your fungal count. 

You can also make your own effective Microbes. Go to your compost heap. Dig out some from the middle section that is nice and warm. Place this in a breathable cloth or bag… Slowly run water through the bag. The slower you can trickle the water the stronger the collection of microbes will be. You want to only collect a small amount of dark liquid.

Fermented Plant & Fruit Juice (FPJ and FFJ)

Do the following

Use L distilled water, and pour out double the amount you have collected from the the compost, the leach. Add the leach and an equal amount of molasses to the distilled water. Close the cap. Let it ferment and open the cap once a day to let gas out. In 4 days you will have EM-1, which can be used to quicker enhance your teas or fermentations.  EM can also be used as part of the integrated pest management(IPM) something we will discuss very soon too. 

In conclusion

It is important to note when you are adding your fertilizer to the plants. During the very early veg stages compost teas, fermented plant juices and fruit juices should not be necessary. If you find yourself having to ‘feed’ young plants, then you should consider taking extra time to prepare the soil first. In your first month of growing cannabis from seed or clone. It is easy to overfeed and give too much. Sometimes it’s better to wait. Less is always more. 

But once you understand when and what to fertilise your plants with. Brewing and fermenting your own fertilizer seems like a no-brainer.

Posted on

Korean Natural Farming

Korean natural farming

As we go deeper down the rabbit hole this grow season. I will continue to discuss concepts and ideas to consider that will help you as a grower this year. But this week I want to interject with an important nutrient conversation. One that is one of my personal favourite growing methodologies as an organic grower. If you haven’t heard of it or want to give it a go. Have a dive into this week’s topic, Korean Natural Farming. 

Korean Natural Farming uses methods that observe the laws of nature and utilize natural materials and products. It is based on the principle of interdependence among all living things. It aims to have a nurturing impact on the environment, in sharp contrast to the disadvantageous effects that often accompany modernized and commercialized agriculture. The observance of the natural cycle and environment-friendly agricultural practices applied in a modern setting refreshes the established perspectives on farming and provides an alternative to technology-intensive agriculture.

How Korean Natural Farming Began

Korean Natural Farming (KNF) was developed by Dr. Cho Han Kyu at the Janong Natural Farming Institute in South Korea. It was originally intended to change the chemical-based and harmful farming methods that were being practised in South Korea. Together with like-minded farmers, he converted his lifelong studies and his own experiences into an innovative farming system that not only promotes respect and care for the environment but also produces more with less cost and labour. KNF Farming recognises the abundance of nature and utilizes indigenous resources for production. Its basic philosophy is to maximize the inborn potential of a life form and its harmony with the environment by not interfering with its growth and development or forcing the crops to yield more than what they can. KNF Farmers believe that the best way to achieve top-quality yield is to respect the nature of life. 

The Methodology

The KNF methodology is based on the Nutritive Cycle Theory, which guides the KNF Farmer on what inputs to apply, how much and how often. Korean Natural Farming applies the principle of interdependence in which people should nurture, instead of surmounting it or undermining it. KNF Farming is also envisioned so as to contribute to the alleviation of poverty, disease and environmental destruction by providing an alternative means of livelihood and food production. 

As a farming method that goes back to basics using materials from nature and without force or chemicals. KNF Farming guarantees its farmers healthy and strong products needed to provide for their families and society. KNF respecting the natural cycle of life is more than a farming technique. It is a philosophy, a new economics and a way of life.

Strengths and Benefits 

Environment-Friendly: Its inputs are made from natural materials, protecting the crops from harmful chemicals used as fertilisers in modern agriculture. In livestock raising, Natural Farming is considered a revolutionary breakthrough, accomplishing the dream method of “Zero emission”. No wastewater is emitted. Also, wastes are recycled and converted to resources. 

HigherYield: It strictly follows the Nutritive Cycle Theory, using accurate amounts of substances at the precise moment, nourishing the soil with the right amounts of nutrients when the plants need it. Hence why we discussed in our previous blogs how important it is to test your soil. Here is a link to Kaya Farms, they are local and have an amazing team.

Low Cost: It helps lessen the farmers’ financial burden with the use of homemade materials and making use of resources from the farm. Often recipes call for leftovers like rice or kitchen scraps. Making it ideal for those looking to produce something from nothing too.

High Quality: Better-quality crops and livestock is the result of the non-usage of chemicals that are harmful to their production as well as the environment.  This has been proven many times since 2011. From increased terpenes to more natural expressive flowers. KNF inputs are superior when done in sync.

Adaptable: KNF can be replicated in any region of ingredients and products used. All areas are unique and this allows for a more eco-friendly nutrient cycle for the plants. Ingredients can be substituted as long as the core ingredients are being respected. 

User Friendly: Methods are free of toxic and poisonous chemicals, which are dangerous to a user’s health. With Natural Farming, farmers cultivate their own substances that truly provide the nutrients to the crops and animals, it also helps without harming the plants, animals and humans. 

Respect for Life: Natural Farming gives utmost respect and care to the crops and animals following the natural cycle of life. Better productivity and even better harvest can be made when one nurses and gives attention to the environment. 

Korean natural farming

The Nutritive Cycle Theory

The Nutritive Cycle Theory states that plants and livestock need different nutrients during different stages of growth. Like humans, plants also need different kinds of food at different stages. Just as a baby can only eat baby food, young plants or animals can only be fed with nutrients that are appropriate for their age. The Nutritive Cycle guides farmers in obtaining the best results from their crops and avoiding disease to their crops through proper nutrient management. The Growth and development of a plant takes a certain course along with the passage of time. All crops go through the stages of growth according to the qualitative changes that occur and mature with flowering and fruiting.

Importance of IMO

KNF produces a good yield when the land cultivated has an excellent soil condition for crops. Microorganisms play an important role in making soil good for growing plants. These microorganisms can also be collected and cultured. Natural Farming promotes the use of Indigenous Microorganisms (IMOs). 

The microorganisms that have been living in the local area for a long time are best for farming because they are very powerful and effective. They have survived and can survive the extreme climatic conditions of the local environment much better than artificially produced microorganisms, which are cultured in some foreign or artificial environment. And since they are already available in the field, they are considered the best inputs for conditioning the land. 

Organisms that are found under the heat of the sun are largely different than those found in shaded areas such as under bamboo trees. Dr. Cho and Dr. Elaine Ingham from the Soil Food Web advocate that it is better to culture microorganisms from different areas in order to collect different kinds of microorganisms (Microbial Diversity).

Korean Natural Farming Inputs

It is also good to culture microorganisms at different weather conditions and to mix different types of microorganisms. In “Non-Chemical” agriculture practices we do not feed the plant. We nurture the soil and the soil nurtures the plant through the IMOs. Microorganisms have two major functions in farming:

Microorganisms decompose complex organic compounds such as dead bodies of plants and animals and wastes into nutrients, making them easily absorbable by plants.

They can create compounds such as antibiotic substances, enzymes and lactic acids that can suppress various diseases and promote healthy soil conditions.

Korean natural farming

Here is how I go about making IMO

It is best to use leftover rice. This will ensure that the rice is not soft or sticky. Rice is placed in a ‘wooden box’ with small holes in the bottom – I normally use a cardboard box. You want to avoid using plastic or glass. 

The box is covered with a paper towel. And that is your basic set-up. 

Now all that needs to be done is, you have to take your box to an identified fugi dominant area. Usual forestry, old growth woods areas are ideal. A place in which decomposing of plant material is happening naturally, where leaves fall from the trees. You want to look for the best place in the shade and place the box in between the organic matter. 

A small collection of sticks and leaves with mycelium attached are laid gently over top of the paper towel—a handful will do.

This rice box is then covered with a tarp and left for 3 to 7 days depending on the temperature (less time in warmer periods), or until mycelium and other microbial populations have colonized the rice in the form of white hyphae spreading through it. The rice should look like a fungus cake almost.

This is what KNF practitioners call IMO-1 (the first stage of IMO). The rice and “mold” is then weighed and mixed together with brown sugar. This sugar stabilizes the microbes, essentially sending them into an arrested state (called IMO-2) where they can easily be woken back up again. Then it is mixed with rice bran or some other carbonaceous material in low piles and lightly composted to enliven the indigenous microorganisms (which makes IMO-3). That mixture is then added to soil and composted at low temperatures again (IMO-4), which itself can be diluted and sprayed on fields or added to a compost pile or woodchips to be composted a third time (making the final IMO-5).

All of these preparations have multiple uses, and KNF deals with more than just soil. There is a whole side to the practice that deals directly with the plants. As stated above, adding the right nutrient at the right time is a critical part of KNF. For instance, Cho recommends a water-soluble calcium (abbreviated WS-CA, made from toasted egg shells and vinegar) at several different stages including “the cross-over period when the growth of crop changes from vegetative to reproductive growth.” Most of the preparations have a multitude of applications and are shelf-stable for months if not years of utility. So even if a little money is needed for brown sugar or rice, that investment theoretically pays back for many years to come.

Korean natural Farming

How to utilize IMO

 In order to be effective, use IMOs continuously. Since IMOs are used to make soil fertile and healthy, these should be collected and prepared as the season progresses each year. In order to bring about continued results. IMOs must be maintained in the soil. Avoid being choosy in collecting microorganisms. Instead, microorganisms from different environments should be collected and mixed. It is recommended to collect IMOs from all four directions of the field. We can also collect microbes from mountains, summits, valleys and trenches.

Personally, I prepare IMO and store it as IMO-2 only before and in the middle of my growth cycles do I then apply it. So I only really make as much as I need for the amount of plants I am growing. Whatever is left is added into the compost teas later on in the cycle. So during the transition period of the plants I culture different IMOs again.

After farming KNF it is hard to change direction back. This has been my findings. There is so much more to be said on IMO alone. But for now, I will leave it here. Next week I will give a list of my top KNF recipes and how you should consider going about making your own nutrients. In the meantime, use this method to create your own IMO culture in your grow space and step into the world of real organic farming

Posted on

Organic or Synthetic Nutrients: Which should you use?

Organic or synthetic nutrients

This week we will discuss Organic and synthetic nutrients. What the strengths and weaknesses of them are and how you can go about deciding which is best for you. When it comes to deciding and sticking to a nutrient regimen I have seen so many growers fall short of what they have planned for their grow seasons. Before you can decide, it is advised that you understand the basics of the fertigation regiment and how it will impact your growing methodology, scale and overall outcome of the flower.

Organic Nutrients

The term generally refers to some nutrient in its most natural state or raw form. Things like animal manure, compost, bone meal, seaweed etc. These generally take much longer to break down in the soil and have undergone little to no chemical processing. Some organic nutrients use fermentation to make nutrients more bioavailable to plants and soil food web as a whole.

Organic or Synthetic Nutrients

Advantages of Organic Nutrients:

Soil Health and Microbial Life: Organic nutrients support a thriving soil ecosystem by promoting beneficial microbes and fungi. These organisms help break down organic matter into forms that plants can easily absorb, creating a living soil environment. This results in healthier plants and a more resilient growing medium over time.

Flavour and Aroma: Many growers believe that using organic nutrients enhances the natural flavour and aroma of cannabis. Since organic growing mimics a plant’s natural environment, it often leads to a richer terpene profile, which directly impacts the taste and smell of the final product. I have not read any scientific papers on this but Most will swear that organic flower produces better entourage effects. Get in the comment section and let us know your opinion on the matter

Environmental Impact: Organic farming methods are generally more sustainable and environmentally friendly. By using renewable resources and avoiding synthetic chemicals, organic growers contribute to the health of the ecosystem, reducing pollution and soil degradation.

Lower Risk of Nutrient Burn: Organic nutrients are released slowly into the soil, reducing the risk of overfeeding or nutrient burn, a common problem with synthetic fertilizers. This mistake can easily be made by newer growers. But understand that in an organic setting nutrient burn and ‘hot soil’ can absolutely occur just as easily if one is just careless about adding amendments 

Disadvantages of Organic Nutrients:

Slower Nutrient Availability: Since organic nutrients need to be broken down by soil microbes before they can be absorbed by the plant, the effects may be slower compared to synthetic nutrients. This can be a disadvantage if you’re looking for rapid growth or if your plants are showing signs of deficiency that require immediate correction.

Inconsistent Nutrient Levels: Organic materials can vary in nutrient content, making it harder to precisely control the nutrient levels your plants receive. This can sometimes result in deficiencies or imbalances if not managed carefully. Something you need to be ok with. It is only until you create well-rounded soil and do testing to know the optimal level that you will be able to avoid these inconsistencies. Even with all the measures, it is just not as precise as the other method and I think this lack of control can cause growers to waste more money than they realize on things they don’t need but don’t know that they don’t need. 

More Labor-Intensive: Organic growing often requires more effort, from creating and maintaining compost to managing soil health. This can be time-consuming, especially for novice growers.

Organic or Synthetic Nutrients

Synthetic Nutrients – Salts

Synthetic mineral salts go by a few names, such as mineral fertilizers, mineral salts, synthetic fertilizers, synthetic nutrients or chemical fertilizers. As some of its names suggest, it’s not completely made up of natural compounds. It’s also worth noting that synthetic mineral salts are not the same as the likes of table salt or sodium chloride. Salts will react to water used to grow a plant and release its ionic nutrients, such as commonly used calcium nitrate and potassium phosphate. These are ionic compounds that plants love because it provides the necessary nutrients that it need to grow. Compared to organic fertilizers, synthetic mineral salts don’t need microbes or bacteria to mineralize or break down nutritional compounds in order to turn them into plant-available elements. In fact, plants don’t know the difference between organic and inorganic elements or plant food.

Organic or Synthetic Nutrients

Advantages of Synthetic Nutrients:

Immediate Results: Synthetic nutrients are water-soluble and can be quickly absorbed by the plant’s roots, leading to faster growth and quicker recovery from nutrient deficiencies. This makes them ideal for growers who need precise control over their plants’ nutrient intake.

Consistency and Precision: With synthetic nutrients, you know exactly what your plants are getting. They are formulated to deliver exact nutrient ratios, allowing for precise feeding schedules tailored to each stage of growth.

Ease of Use: Synthetic nutrients are generally easier to use. They often come with clear instructions and can be applied directly, without the need for composting or brewing teas. With the right tools, this becomes very simple and manageable. This can often lead to debates over powder or liquid fertilizer being better…

Disadvantages of Synthetic Nutrients:

Impact on Soil Health: Over time, synthetic nutrients can degrade soil health by killing off beneficial microbes and fungi. This can lead to a sterile growing medium that requires ongoing inputs to maintain plant health.

Environmental Concerns: The production and use of synthetic fertilizers contribute to pollution, including runoff into waterways that can harm aquatic life. Additionally, their overuse can lead to soil degradation and a dependency on chemical inputs.

Risk of Overfeeding: Since synthetic nutrients are highly concentrated, there’s a greater risk of overfeeding and nutrient burn. This can damage plants and reduce yields if not carefully monitored.

Carbon-integrated nutrients

An emerging trend in cannabis cultivation, combining the benefits of organic and synthetic nutrients with the added advantage of carbon-based compounds. These nutrients are designed to enhance plant growth by improving nutrient absorption and promoting overall plant health.

Carbon-integrated nutrients incorporate carbon-rich compounds, such as humic acids, fulvic acids, and other organic carbon sources, into the nutrient formula. These compounds act as natural chelators, binding to essential nutrients and making them more available to plants. The integration of carbon in nutrient formulas aims to optimize nutrient uptake, enhance soil structure, and stimulate beneficial microbial activity.

Organic or Synthetic Nutrients

Advantages of Carbon-Integrated Nutrients

Enhanced Nutrient Absorption: Carbon-rich compounds like humic and fulvic acids are known for their ability to chelate nutrients. This means they bind to essential elements, such as iron, magnesium, and calcium, making them more readily available to the plant’s roots. This can lead to improved nutrient uptake, resulting in healthier and more vigorous growth.

Improved Soil Health: Carbon-integrated nutrients contribute to the long-term health of your growing medium. They enhance soil structure by increasing organic matter content, which improves water retention, aeration, and overall soil fertility. This creates an environment that supports healthy root development and a thriving microbial ecosystem.

Stimulates Microbial Activity: The organic carbon in these nutrients acts as a food source for beneficial microbes in the soil. These microbes play a crucial role in breaking down organic matter, cycling nutrients, and protecting plants from pathogens. By promoting a healthy microbial population, carbon-integrated nutrients help create a more resilient and productive growing environment.

Compatibility with Both Organic and Synthetic Systems: Carbon-integrated nutrients can be used in conjunction with both organic and synthetic growing systems. This flexibility allows growers to incorporate the benefits of carbon-based compounds into their existing nutrient regime, whether they’re using organic amendments, synthetic fertilizers, or a combination of both.

Enhanced Plant Stress Tolerance: The presence of carbon-rich compounds can help plants better withstand environmental stresses, such as drought, temperature fluctuations, and nutrient imbalances. This is because carbon compounds can improve water retention in the soil and enhance the plant’s overall resilience.

Disadvantages of Carbon-Integrated Nutrients

Cost: Carbon-integrated nutrients tend to be more expensive than traditional organic or synthetic nutrients due to the added complexity of the formulation. For some growers, especially those operating on a tight budget, this cost may be a significant consideration.

Complexity in Use: While carbon-integrated nutrients offer numerous benefits, they can be more complex to use effectively. Understanding how these nutrients interact with your specific growing medium and environment may require additional knowledge and experience.

Organic or Synthetic Nutrients

How to Choose the Best Fit for Your Needs

Consider Your Growing Goals: If you prioritize sustainability, soil health, and superior flavour, organic nutrients might be the best choice. Organic growing is ideal for those who enjoy the process of nurturing a living soil and are patient with the slower pace of nutrient uptake.

If you’re focused on maximizing yields, achieving rapid growth, and maintaining precise control over your nutrient regime, synthetic nutrients could be more suitable. This option is often preferred by commercial growers or those looking for efficiency and consistency.

Think About Environmental Impact: If reducing your ecological footprint is important, organic growing is the way to go. However, there are ways to mitigate the environmental impact of synthetic nutrients, such as using them sparingly and combining them with organic practices like carbon-integrated nutrient solutions.

Consider the Growing Medium: Organic nutrients work best in soil or organic-based growing mediums that support microbial life. Synthetic nutrients, on the other hand, can be used in a variety of mediums, including hydroponics, where organic options are more limited. 

Most importantly, whatever you decide. Stick to it, too many times growers switch up their nutrient lines and methodologies during a grow cycle causing massive harm. Learn more this season as you grow and you will find that either organic or synthetic nutrients will work for you.

Posted on

Growing Cannabis Outdoors: 7 Things To Consider When Getting Started

Growing Cannabis Outdoors: 7 Things To Consider When Getting Started

Every year, more and more people are exercising their constitutional rights as South Africans to grow their own cannabis. So often hard lessons are learned during the beginning stages that people get discouraged and never pick up growing a little bit of their own medicine for once. So here are 7 basic things to consider before you get started growing cannabis outdoors. 

  1. Assess your Growing Space

The first thing would be to assess and identify the best growing space. You want to find a space that is private and not visible to the public as well as not accessible to everyone. Cannabis is a cash crop and will always remain one. Remember that your available space will determine how many plants you can grow comfortably and which growing methodology to apply. 

It’s great to have cannabis growing and lots of it. Trust me I know… But you have to do your best not to overcrowd your space. This can cause airflow issues, leading to other issues like mould and plant diseases.

growing cannabis outdoors
  1. Evaluate the Grow Environment

Your growing environment is really important. A successful outdoor cultivator will always thank Mother Nature for a brilliant season. And pat himself/herself on the back for when she was tough on them. So consider the following:

Sunlight: We know that cannabis needs light to grow. But consider whether or not your space has enough sunlight and whether or not things like trees, buildings and street lights will influence your identified grow space. You want the most natural light exposure possible with as little obstruction as possible.

growing cannabis outdoors

Protection from the elements: Cannabis is a hardy plant. It has been shown to withstand extreme weather. But this won’t be ideal for Your cannabis. So consider the amount of rain, wind and overall temperature fluctuations the plants will experience. You might want to raise the plants off the floor if things can flood during the summer in your backyard. Just something to consider.

Pests and Pets: Most outdoor grows will be subjected to pests and diseases. It is the grower’s job to be proactive and keep and clean space as well as maintain plant health by having an Integrated pest management system in place. Companion planting, herbicide or bioactive measures can be put in place. Consider your animals, you might want to keep animals such as dogs and cats away from the cannabis plants as pet hairs can get into your flowers. They also can sometimes run around and destroy things… So consider this.

  1. Your Grow Medium

The grow medium you select is of extreme importance. It will help determine the nutrient selection for the grow cycle, your watering schedule and overall plant health and yield capacities.

In-ground vs Containers:

When you grow directly in the ground, the plants are provided with more room for root expansion. Your plants will be in one location which can have its downfalls if the weather was to get out of hand. Growing in containers gives you the ability to move your plants if you have to but also gives you more control over the root zone in general. The size of your root determines the size of your fruits. This is an old phrase that has some truth to it but really isn’t set in stone.

growing cannabis outdoors

Soil vs. Soilless Mediums: 

Soil is up of living organisms, organic material, sand, clay or loam. Is rich in nutrients and can be easier for beginners to manage. The occasional supplement of nutrients in the form of a compost tea can go a long way. Many hardcore organic growers have their own special soil mixture that they make over the years. Giving an extra uniqueness to their growing talents and cannabis as a whole. Soilless mediums like coco-coir and perlite normally are inert, it hold no nutrients. Some more experienced growers prefer this. This gives them the freedom to give the plant what it needs when it needs it. Although Soilless mediums can be treated like soil, it is important to know that it has more in common with hydroponics than it does with organics.

  1. What is your water quality like?

Water not only is essential to growing cannabis but the quality of the water will drastically affect your outcomes. Know where the water is coming from. This alone will make you smarter and more effective at growing dank. Think of the following:

Water Source: Is it rainwater, tap water or are you getting it from a dam or river? Your water source often will have its own set of challenges from pH to mineral content (TDS) and toxicity. Cannabis plants will thrive in water that is kept in check. Every phase of your plants’ life produces better at a different pH. Different nutrient uptakes and all those things are important with the pH. So knowing if you have Hard or soft water will help you in making a decision in filtration or aeration of the water prior to you feeding it to the plants. The better your attention to detail the better your cannabis plant will reward you.

growing cannabis outdoors

Watering Schedule: During the season your water demands will change. Will you be able to adjust your watering schedule and amounts? Soil and Soilless mediums have their own set of challenges when subjected to outdoor weather. Be mindful of this and ensure you can stay on top of this.

  1. Your Budget

We can spend zero rands on a grow and still grow dank. We can spend little bits of money or thousands. This is all determined by your budget and needs. Growing can be simple or complex. Your scale and the quality you wish to achieve will affect your pocket. Know that not everything is free.

Initial Setup Costs: Consider the cost of seeds or clones, Growing containers or even building raised beds, nutrients, grow medium and equipment you will need like pH meters, soil moisture meters etc. Everything adds up. And they add up quickly. So budget ahead of time. See what you can afford and use what you can. Here is what I did when I started. I couldn’t afford a pH meter. So I went to my local fish pet store and bought the liquid pH test kit. It will give you an indication of where you are on the pH scale.

growing cannabis outdoors

Backup Funds: Knowing that things will break and eventually need replacing. You should consider building a fund for your grow to help replace things as the grow is ongoing. YOu will find that many other expenses will pop up for things unexpected. Instead of having it surprise you and take from your day-to-day money. Put a little bit aside for this event. It is bound to happen.

  1. Do you have the Time?

Growing really good cannabis is time-consuming. Like anything else. The more you invest into it the more it can reward you. Be realistic regarding this. Do not expect the best out of the plants if you are not present. 

Time Commitment: You need to water the plants. Monitor them for issues and perform basic clean-up on the plant. If you don’t it will just negatively affect your desired outcomes and cause more issues in the growing cycle. How much time do you really have for all this? Maybe growing all those plants is not gonna work… Start small and grow within your means.

You should set up an almost ritualistic schedule around your plants and your lifestyle. If you have to be somewhere by 8 am… Be in the garden by 7… if you get home at 5 pm… start your monitoring at 6 pm… Make a plan but don’t do nothing.

  1. Are you willing to Adapt?

Growing Cannabis Outdoors is rewarding but it can truly challenge you as a person. Are you tenacious and do you think out of the box? Sometimes you are forced to be creative to help your plants. Sometimes you need to be a scientist to get the best out of your cannabis. Are you capable of this? Or even willing to give it a go?


Problem-Solving: Your ability to respond to these challenges will greatly impact the quality of your grow. Whether it’s adjusting to an unexpected cold snap or finding a quick solution to a pest infestation, being adaptable is key.

Learning and Adjusting: Each growing season offers lessons. If something goes wrong, take it as an opportunity to learn and improve your methods for the next season. Your willingness to adapt and evolve will be a major factor in your success.

Growing cannabis outdoors

Starting an outdoor cannabis grow can be an incredibly rewarding experience, but it requires careful planning and consideration of several factors. By taking the time to assess your space, environment, grow medium, water quality, budget, schedule, and adaptability, you’ll set yourself up for a successful growing season. Remember, every grow is a learning experience, so don’t be afraid to make adjustments along the way and learn from your successes and challenges. Happy growing!