Posted on

Mastering Drying and Trimming: Essential Steps in Post-Harvest Cannabis Cultivation

Mastering Drying and Trimming: Essential Steps in Post-Harvest Cannabis Cultivation
No Audio File Available. Weare experiencing software issues and will upload the audio ASAP.

As the cannabis cultivation journey progresses, we enter a pivotal phase—post-harvest processing. Last week, we explored the role of drying and curing in maximising the quality and potency of your harvest. This week, we’ll take a closer look at the art and science of drying and trimming cannabis, two critical steps that shape the final product’s quality, appeal, and therapeutic potential. Previously we have mentioned environmental controls and the importance of being able to regulate the space.

The Importance of Drying in Cannabis Cultivation

Drying is the first post-harvest step that stabilises cannabis by removing excess moisture. Proper drying preserves cannabinoids, terpenes, and overall product integrity while reducing the risk of mould or microbial contamination. According to research, maintaining specific conditions—temperatures between 16–21°C and relative humidity around 50–60%—ensures the preservation of volatile terpenes and the optimal conversion of acidic cannabinoids like THCA to THC​.

Innovative drying methods, such as microwave-infrared technology and solid-state microwave drying, offer faster and more energy-efficient alternatives to traditional hang-drying techniques. While these methods maintain comparable cannabinoid levels, they require careful adaptation to prevent terpene loss or trichome damage​. We will touch on this a bit more below. 

Over the many years, I have noticed so many different ways to go about these steps with so many varying results. I have stopped trying to give my 2c on the matter directly. All I wish is to explain the importance of the steps and why it is crucial to consider them. Let me know what methods you go about in your our growing journies, I am keen to hear from you.
Mastering Drying and Trimming: Essential Steps in Post-Harvest Cannabis Cultivation

Trimming: Wet vs. Dry—Understanding the Differences

Trimming involves removing excess leaves and stems from the cannabis flowers to improve their appearance and potency. While both wet and dry trimming achieve similar outcomes, their methodologies vary:

Wet Trimming:

Wet trimming involves removing the fan leaves and sugar leaves from cannabis flowers immediately after harvesting, while the plant material is still fresh and moist. This method offers specific benefits and creates unique conditions that influence the drying and curing processes.

Moisture Removal at the Start: Wet trimming eliminates much of the plant’s water-laden foliage at the outset, which helps reduce the overall moisture content of the harvested material. By removing fan leaves before drying, growers minimize the risk of moisture pockets forming around dense buds, which can lead to mould or mildew.

Enhanced Airflow for Drying: Trimming wet cannabis exposes the buds directly to airflow during the drying stage, ensuring a more uniform drying process. Without the extra foliage, air circulates more freely around the flowers, reducing drying times and helping to stabilize humidity levels in the drying environment.

Impact on Trichomes: When trimming fresh buds, trichomes—the resinous structures containing cannabinoids and terpenes—are more pliable due to the high moisture content. This reduces the risk of trichome damage or loss during handling. However, excessive or careless handling during wet trimming can still cause bruising or degradation of delicate trichomes.

Simpler Cleanup and Efficiency: Wet trimming tends to be faster and less labour-intensive than dry trimming because fresh plant material is more manageable and doesn’t crumble or stick to tools as much. This is not to say that it is not a sticky process at times. The processes of wet trimming can also occur a day before harvesting, with some growers using the last day or so to start removing big fan leaves, making the harvesting and actual trimming a bit easier. Additionally, the removed leaves are fresh and can be repurposed immediately for extracts or composting, enhancing efficiency.

While wet trimming creates a streamlined drying process, it also removes some of the natural “moisture barriers” that leaves provide, potentially speeding up the drying phase too much if environmental conditions aren’t carefully controlled. As a result, growers must closely monitor temperature and humidity to avoid over-drying or terpene loss. Wet trimming is especially favoured for large-scale operations where time and space optimization are critical.

Mastering Drying and Trimming: Essential Steps in Post-Harvest Cannabis Cultivation

Dry Trimming:

Dry trimming is the process of removing excess leaves from cannabis flowers after the plant has been fully dried. This method allows the buds to retain more of their natural moisture during the drying process, which can have significant effects on quality, terpene retention, and the overall structure of the final product.

Preservation of Terpenes During Drying: By leaving fan and sugar leaves intact during the drying stage, the outer layers of foliage act as a natural barrier, protecting the delicate trichomes and terpenes from excessive exposure to air, light, and handling. This helps to slow the drying process, creating an environment where terpenes are less likely to evaporate prematurely, resulting in a richer aroma and flavour profile in the final product.

Moisture Retention for Controlled Drying: With dry trimming, the leaves shield the buds, slowing down moisture evaporation and contributing to a more gradual drying phase. This extended drying time can enhance the chemical complexity of cannabinoids and terpenes while reducing the harshness of the smoke or vapour.

Handling Trichomes: Once the cannabis is dried, trichomes become more brittle and can easily detach from the buds during handling. Dry trimming requires extra care to avoid damaging or losing these resinous glands, which contain the plant’s active compounds. Proper tools and techniques, such as using sharp scissors and minimizing pressure on the buds, are essential to preserving trichome integrity.

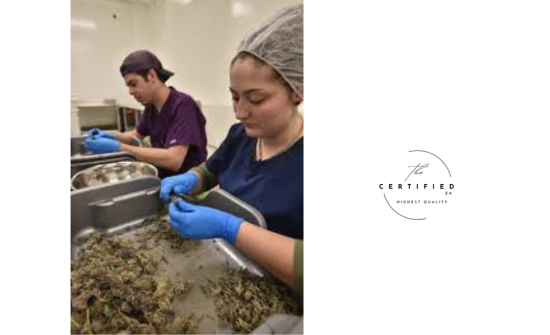
Time and Labour Considerations: While dry trimming can enhance quality, it is generally more labour-intensive than wet trimming. The dried leaves can be harder to cut and may stick to tools, requiring frequent cleaning. However, this method is often preferred by growers who prioritize terpene preservation and bud aesthetics over time efficiency. Often referred to as ‘Trim Jail’ by many, dry trimming can either be extremely therapeutic or very painstaking. Personally, I have found it to be torture and I hate it. Yet, it is the method of choice for me too. 

Dry trimming is ideal for growers who want to emphasize the natural essence of their cannabis, creating a product with superior aroma, flavour, and visual appeal. However, it requires patience and a controlled drying environment to achieve the best results, making it a technique that rewards careful craftsmanship.

Studies reveal a trade-off between the two: wet trimming prioritizes cannabinoid preservation, while dry trimming emphasizes terpene retention. Growers must assess their goals to determine which method aligns best with their desired outcomes​.

Mastering Drying and Trimming: Essential Steps in Post-Harvest Cannabis Cultivation

Optimizing Drying Spaces:

Ensure adequate airflow using fans or dehumidifiers to avoid moisture buildup and uneven drying. Implement proper lighting controls to reduce exposure to UV rays, which can degrade cannabinoids and terpenes​. Read up more on our blog last week to understand the importance of all these things. 

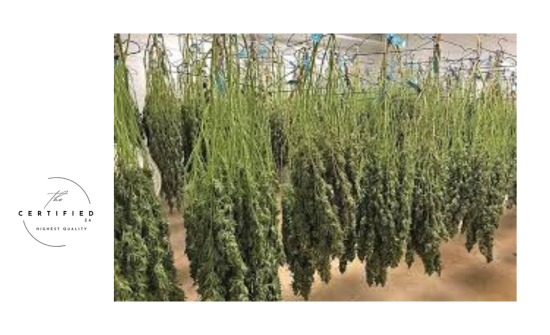
Hang-Drying for Optimal Results

Hang-drying is the traditional and most widely used method for drying cannabis due to its simplicity and effectiveness. This technique involves suspending cannabis plants upside-down in a controlled environment, allowing airflow to naturally wick away moisture from the buds. 

For large plant sections, such as branches, it’s essential to remove excess fan leaves before hanging to improve airflow and reduce drying time. These sections should be trimmed evenly to avoid overly dense areas that could retain moisture and encourage microbial growth. For growers opting to hang entire plants, ensure adequate spacing between plants to allow air circulation around the canopy. This method slows the drying process slightly, which can enhance terpene preservation and improve the overall quality of the final product.

Microwave-Infrared Drying: A Modern Alternative

Microwave-infrared drying is an innovative technique gaining traction in cannabis production, especially among commercial growers. This method uses a combination of microwave energy and infrared radiation to remove moisture rapidly while preserving cannabinoids and terpenes. The microwaves heat the water molecules inside the plant material, causing them to evaporate, while the infrared radiation evenly distributes heat, preventing hot spots and maintaining the structural integrity of the buds.

This approach significantly reduces drying times—from days to mere hours—making it an attractive option for large-scale operations. However, the initial investment can be substantial. Microwave-infrared drying systems typically range from $10,000 to $50,000 or more, depending on capacity and features. While this cost may be prohibitive for small growers, the efficiency and scalability make it a viable solution for commercial enterprises looking to streamline their post-harvest processes.

Both traditional and modern drying techniques offer unique advantages, and growers must weigh their resources, goals, and scale to choose the method that best suits their needs.

Microbial Control

Recent studies highlight the importance of regulating yeast and mould levels during drying. Factors like genotype, humidity, and airflow play a significant role in reducing microbial growth and ensuring product safety. For dry trimmers, ensuring correct monitoring practices and checks are important. Microbial issues are more prone in this method than wet trimming, however, there are other things to watch out for in that regard. 
Mastering Drying and Trimming: Essential Steps in Post-Harvest Cannabis Cultivation

The Craftsmanship Behind Trimming

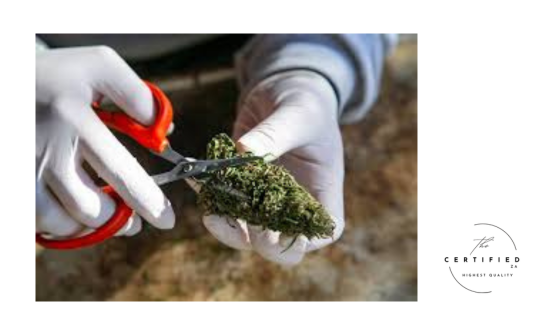
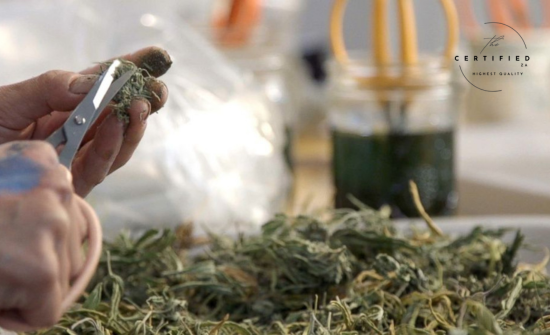
Whether you choose wet or dry trimming, attention to detail remains paramount. Hand-trimming allows for precision and minimizes damage to trichomes, but it’s labour-intensive. Without a doubt, if you take your time to develop technique and patience you to will have manicured flowers like in the movies. Mechanical trimmers provide efficiency but may compromise quality if not handled properly. Sometimes better suited for wet trimming methods, but recently many companies have adapted their rigs to handle both wet and dry trimming. Balancing these approaches with your operational scale and product goals is essential for success.
Mastering Drying and Trimming: Essential Steps in Post-Harvest Cannabis Cultivation

Drying and trimming are where the artistry of cultivation meets scientific precision. Whether you’re drying in a traditional hang-dry room exploring advanced microwave technologies, or trimming wet or dry, your choices will define your cannabis product’s final quality. By tailoring these processes to align with your goals—whether maximizing cannabinoids, terpenes, or aesthetic appeal—you set the stage for a premium end product that reflects your dedication and expertise.

Next week, we’ll delve deeper into advanced curing techniques, exploring how slow, controlled maturation unlocks the full potential of your cannabis. Until then, embrace the journey and celebrate each step as a testament to your craft.

Posted on

Drying and Curing Cannabis: The Art of Post-Harvest Perfection

Drying and Curing Cannabis: The Art of Post-Harvest Perfection
MInor issues with current audio file

As we turn the page to another chapter in our cannabis cultivation journey, it’s time to explore one of the most crucial post-harvest stages: drying and curing. These processes define the quality, potency, and overall experience of your final product. Last week, we reflected on the dynamic relationship between cannabis and hemp, bridging our understanding of its versatility. This week, we focus on how growers can harness the art and science of drying and curing to preserve the best of what cannabis has to offer.

Drying and Curing: Understanding the Differences

Though often mentioned in tandem, drying and curing serve distinct roles in post-harvest processing:

Drying: This initial step removes excess moisture from the harvested cannabis to prevent mould and decay. Proper drying stabilizes the plant material, preparing it for long-term storage and further processing. According to recent studies, factors like temperature, humidity, and airflow significantly influence the retention of cannabinoids and terpenes during drying​

Curing: Curing comes after drying and involves slow maturation of the cannabis in controlled conditions. This process enhances the chemical complexity of the cannabinoids and terpenes while improving flavour, aroma, and smoothness. It’s akin to ageing fine wine—patience is key for premium results​

Drying and Curing Cannabis: The Art of Post-Harvest Perfection As we turn the page to another chapter in our cannabis cultivation journey, it’s time to explore one of the most crucial post-harvest stages: drying and curing. These processes define the quality, potency, and overall experience of your final product. Last week, we reflected on the dynamic relationship between cannabis and hemp, bridging our understanding of its versatility. This week, we focus on how growers can harness the art and science of drying and curing to preserve the best of what cannabis has to offer. Drying and Curing: Understanding the Differences Though often mentioned in tandem, drying and curing serve distinct roles in post-harvest processing: Drying: This initial step removes excess moisture from the harvested cannabis to prevent mould and decay. Proper drying stabilizes the plant material, preparing it for long-term storage and further processing. According to recent studies, factors like temperature, humidity, and airflow significantly influence the retention of cannabinoids and terpenes during drying​ Curing: Curing comes after drying and involves slow maturation of the cannabis in controlled conditions. This process enhances the chemical complexity of the cannabinoids and terpenes while improving flavour, aroma, and smoothness. It’s akin to ageing fine wine—patience is key for premium results​ ​ Key Components for Success To master drying and curing, growers must carefully balance several critical factors. This can take many seasons to figure out and it is important to recognise that when you are just getting started being in control of all factors can be tricky. Try and get the following down. Harvest Timing Timing is everything. Trichome maturity dictates the peak potency and flavour profile. Harvesting too early or late can drastically affect the final quality​. There are many ways to determine harvest readiness. When looking at an overall bro-science approach, growers check trichomes on flowers with a jeweller loop. Looking at the concentration of trichomes and their maturity, some want to see a ratio of 10% amber to milky trichomes when looking at a selected area on the plant. Drying Environment Room Size: The space in which you decide to do your post-harvesting is crucial. The room needs to be clean, dry, and dark. You also need to consider the overall space of the room compared to your harvest. Cramming too much produce in a room can cause issues, as can having too much space for not that much produce. Temperature: Optimal ranges between 16–21°C to avoid terpene evaporation while ensuring moisture reduction. This too can be easier said than done. Most times growers select a space that they have the least control over and or is in too much direct sunlight. Your temps can be controlled by an A/C unit too, but consider what it would do to your electricity bill and if the size of the Aircon unit you can afford will work for your room. Humidity: Keeping relative humidity (RH) at 50–60% minimises mould risk and promotes even drying. This will also ensure that your curing process is more stable and consistent. When relative humidity fluctuates too much during drying, the problems it can cause, even in ideal temperatures, cannot be ignored. It's so important not to have drastic changes in these. Airflow: Gentle circulation prevents moisture buildup without damaging the trichomes, the tiny structures rich in cannabinoids and terpenes​. It also helps avoid mould, but if done incorrectly, it can aid in drying the cannabis too fast, which can cause flavour and effect imbalances. . Curing Process Use airtight containers like glass jars to retain the terpene profile and cannabinoids while controlling residual moisture. This process should take time. There is no need to rush the curing process as it is the last effort required to lock in all the goodness the flower has to offer. I always say, there are a thousand ways to skin a cat. And when I look at different growers doing different drying and curing techniques it's hard to just say this is wrong and this is best. What all growers are trying to achieve during the process is the same. As long as you have an understanding of what it is you are trying to achieve, your methods to your madness are your own. Some people burp jars in the first few weeks to let the last moisture out of the jars and to ensure no mould can fester on the inside. This slower release of moisture in the jars aids in the curing process resulting in a smoother smoke. Other growers will say if the flower is releasing moisture then you havent dried it correctly…You decide which is which. . Considerations for Growers Space Planning Whether cultivating indoors, outdoors, or in a greenhouse, drying and curing requires dedicated, controlled environments. Consider modular drying racks or customized climate chambers for efficiency​. Make sure you have enough space prior to you growing the cannabis. Know what the drying and curing capacity is of your space will also create less stress. There is nothing worse than not having enough space for all your cannabis. YOu will end up ruining all your cultivation efforts just due to lack of space or excitement to plant, whichever way you want to look at it. Cultivar-Specific Approaches Each strain or chemovar responds differently to drying conditions. Research suggests that controlled atmosphere chambers tailored to the cultivar’s chemical composition can optimize cannabinoid and terpene retention​. I don’t doubt that this is a bit more advanced know how and that not everyone will grasp this. But if you are learning from previous harvests then optimising your room from previous settings will only make your results better. . Scalability and Efficiency Large-scale growers may benefit from integrating innovative methods like vacuum-microwave drying or controlled nitrogen environments to reduce processing time while preserving quality​. On large scale operations it is important that things flow consistantly, and not having space is not an option, So for those that can afford this investment it really is a gam changer. The Role of Science in cannabis drying and curing Drying and curing cannabis is where science meets art, blending precise environmental controls with intuitive craftsmanship honed through experience. Each stage is a delicate balance of preserving the plant’s biochemical integrity while enhancing its sensory and medicinal qualities. The Foundation of Precision Scientific research provides invaluable insights into the optimal conditions for drying and curing cannabis. Key studies highlight how cannabinoids and terpenes—critical to the plant’s potency, flavour, and therapeutic effects—are highly sensitive to temperature, humidity, and oxygen exposure. For example: Cannabinoid Preservation: THC and CBD degrade under excessive heat or prolonged light exposure. Scientific studies recommend temperatures between 16–21°C to stabilize these compounds during drying. Terpene Retention: Terpenes, which are volatile organic compounds, evaporate easily if temperatures exceed 21°C or if the airflow is too strong. Controlled drying environments minimize this loss, ensuring the final product retains its distinctive aroma and effects. Curing Chemistry: During curing, residual moisture evaporates slowly, and cannabinoids continue to mature. This process enhances the smoothness and complexity of the smoke or vapour, with studies showing that extended curing can increase the conversion of inactive cannabinoid precursors into their active forms. Science also drives innovation. Techniques like vacuum-microwave drying and controlled-atmosphere curing chambers are emerging as tools to streamline these processes while preserving quality. These advancements ensure consistency, scalability, and efficiency—qualities essential for commercial cannabis production. Craftsmanship: The Art of Mastery While science provides the foundation, craftsmanship transforms cannabis drying and curing into an art form. Experienced growers develop an intuitive understanding of their plants, tailoring drying and curing methods to bring out the best in each cultivar. Cultivar-Specific Adjustments: Every cannabis strain has a unique chemical profile, and no two cultivars respond identically to drying and curing conditions. Skilled growers assess factors like bud density, terpene profiles, and resin production to adjust airflow, temperature, and humidity levels accordingly. Tactile Expertise: The ability to "read" a plant’s readiness for the next stage—whether it’s the snap of a stem during drying or the texture of buds during curing—is an invaluable skill honed through practice. This tactile approach ensures that the product is neither over-dried nor under-cured, preserving its optimal quality. The Element of Patience: Unlike the fast-paced nature of cultivation, curing requires patience. Master growers understand that rushing this process can compromise the flavour, potency, and overall experience. Their dedication to the craft ensures that every jar opened by a consumer delivers the intended quality. There are some growing cups that only permits flower that has been cured for a minimum of 6 months. So just think about that. Synergy of Science and Art The true magic of drying and curing lies in the synergy of science and craftsmanship. While scientific principles establish the parameters for success, it is the grower’s hands-on approach and experience that ensures the process achieves its full potential. As cannabis growers, the drying and curing stages are where your hard work truly transforms into a masterpiece. By understanding the nuances of these processes and tailoring them to your specific environment and strains, you can ensure top-tier quality in every harvest. Next week, we’ll delve deeper into the advanced techniques and technologies reshaping the drying and curing landscape. We will talk about wet trimming and dry trimming. Things like the box dryer and even the Curidor. Until then, remember: cannabis cultivation is a blend of science, craftsmanship, and passion—just like drying and curing, it’s all about finding the perfect balance.

Key Components for Success

To master drying and curing, growers must carefully balance several critical factors. This can take many seasons to figure out and it is important to recognise that when you are just getting started being in control of all factors can be tricky. Try and get the following down.

Harvest Timing

Timing is everything. Trichome maturity dictates the peak potency and flavour profile. Harvesting too early or late can drastically affect the final quality​. There are many ways to determine harvest readiness. When looking at an overall bro-science approach, growers check trichomes on flowers with a jeweller loop. Looking at the concentration of trichomes and their maturity, some want to see a ratio of 10% amber to milky trichomes when looking at a selected area on the plant. 

Drying Environment

Room Size: The space in which you decide to do your post-harvesting is crucial. The room needs to be clean, dry, and dark. You also need to consider the overall space of the room compared to your harvest. Cramming too much produce in a room can cause issues, as can having too much space for not that much produce. 

Temperature: Optimal ranges between 16–21°C to avoid terpene evaporation while ensuring moisture reduction. This too can be easier said than done. Most times growers select a space that they have the least control over and or is in too much direct sunlight. Your temps can be controlled by an A/C unit too, but consider what it would do to your electricity bill and if the size of the Aircon unit you can afford will work for your room. 

Humidity: Keeping relative humidity (RH) at 50–60% minimises mould risk and promotes even drying. This will also ensure that your curing process is more stable and consistent. When relative humidity fluctuates too much during drying, the problems it can cause, even in ideal temperatures, cannot be ignored. It’s so important not to have drastic changes in these. 

Airflow: Gentle circulation prevents moisture buildup without damaging the trichomes, the tiny structures rich in cannabinoids and terpenes. It also helps avoid mould, but if done incorrectly, it can aid in drying the cannabis too fast, which can cause flavour and effect imbalances.

Drying and Curing Cannabis: The Art of Post-Harvest Perfection As we turn the page to another chapter in our cannabis cultivation journey, it’s time to explore one of the most crucial post-harvest stages: drying and curing. These processes define the quality, potency, and overall experience of your final product. Last week, we reflected on the dynamic relationship between cannabis and hemp, bridging our understanding of its versatility. This week, we focus on how growers can harness the art and science of drying and curing to preserve the best of what cannabis has to offer. Drying and Curing: Understanding the Differences Though often mentioned in tandem, drying and curing serve distinct roles in post-harvest processing: Drying: This initial step removes excess moisture from the harvested cannabis to prevent mould and decay. Proper drying stabilizes the plant material, preparing it for long-term storage and further processing. According to recent studies, factors like temperature, humidity, and airflow significantly influence the retention of cannabinoids and terpenes during drying​ Curing: Curing comes after drying and involves slow maturation of the cannabis in controlled conditions. This process enhances the chemical complexity of the cannabinoids and terpenes while improving flavour, aroma, and smoothness. It’s akin to ageing fine wine—patience is key for premium results​ ​ Key Components for Success To master drying and curing, growers must carefully balance several critical factors. This can take many seasons to figure out and it is important to recognise that when you are just getting started being in control of all factors can be tricky. Try and get the following down. Harvest Timing Timing is everything. Trichome maturity dictates the peak potency and flavour profile. Harvesting too early or late can drastically affect the final quality​. There are many ways to determine harvest readiness. When looking at an overall bro-science approach, growers check trichomes on flowers with a jeweller loop. Looking at the concentration of trichomes and their maturity, some want to see a ratio of 10% amber to milky trichomes when looking at a selected area on the plant. Drying Environment Room Size: The space in which you decide to do your post-harvesting is crucial. The room needs to be clean, dry, and dark. You also need to consider the overall space of the room compared to your harvest. Cramming too much produce in a room can cause issues, as can having too much space for not that much produce. Temperature: Optimal ranges between 16–21°C to avoid terpene evaporation while ensuring moisture reduction. This too can be easier said than done. Most times growers select a space that they have the least control over and or is in too much direct sunlight. Your temps can be controlled by an A/C unit too, but consider what it would do to your electricity bill and if the size of the Aircon unit you can afford will work for your room. Humidity: Keeping relative humidity (RH) at 50–60% minimises mould risk and promotes even drying. This will also ensure that your curing process is more stable and consistent. When relative humidity fluctuates too much during drying, the problems it can cause, even in ideal temperatures, cannot be ignored. It's so important not to have drastic changes in these. Airflow: Gentle circulation prevents moisture buildup without damaging the trichomes, the tiny structures rich in cannabinoids and terpenes​. It also helps avoid mould, but if done incorrectly, it can aid in drying the cannabis too fast, which can cause flavour and effect imbalances. . Curing Process Use airtight containers like glass jars to retain the terpene profile and cannabinoids while controlling residual moisture. This process should take time. There is no need to rush the curing process as it is the last effort required to lock in all the goodness the flower has to offer. I always say, there are a thousand ways to skin a cat. And when I look at different growers doing different drying and curing techniques it's hard to just say this is wrong and this is best. What all growers are trying to achieve during the process is the same. As long as you have an understanding of what it is you are trying to achieve, your methods to your madness are your own. Some people burp jars in the first few weeks to let the last moisture out of the jars and to ensure no mould can fester on the inside. This slower release of moisture in the jars aids in the curing process resulting in a smoother smoke. Other growers will say if the flower is releasing moisture then you havent dried it correctly…You decide which is which. . Considerations for Growers Space Planning Whether cultivating indoors, outdoors, or in a greenhouse, drying and curing requires dedicated, controlled environments. Consider modular drying racks or customized climate chambers for efficiency​. Make sure you have enough space prior to you growing the cannabis. Know what the drying and curing capacity is of your space will also create less stress. There is nothing worse than not having enough space for all your cannabis. YOu will end up ruining all your cultivation efforts just due to lack of space or excitement to plant, whichever way you want to look at it. Cultivar-Specific Approaches Each strain or chemovar responds differently to drying conditions. Research suggests that controlled atmosphere chambers tailored to the cultivar’s chemical composition can optimize cannabinoid and terpene retention​. I don’t doubt that this is a bit more advanced know how and that not everyone will grasp this. But if you are learning from previous harvests then optimising your room from previous settings will only make your results better. . Scalability and Efficiency Large-scale growers may benefit from integrating innovative methods like vacuum-microwave drying or controlled nitrogen environments to reduce processing time while preserving quality​. On large scale operations it is important that things flow consistantly, and not having space is not an option, So for those that can afford this investment it really is a gam changer. The Role of Science in cannabis drying and curing Drying and curing cannabis is where science meets art, blending precise environmental controls with intuitive craftsmanship honed through experience. Each stage is a delicate balance of preserving the plant’s biochemical integrity while enhancing its sensory and medicinal qualities. The Foundation of Precision Scientific research provides invaluable insights into the optimal conditions for drying and curing cannabis. Key studies highlight how cannabinoids and terpenes—critical to the plant’s potency, flavour, and therapeutic effects—are highly sensitive to temperature, humidity, and oxygen exposure. For example: Cannabinoid Preservation: THC and CBD degrade under excessive heat or prolonged light exposure. Scientific studies recommend temperatures between 16–21°C to stabilize these compounds during drying. Terpene Retention: Terpenes, which are volatile organic compounds, evaporate easily if temperatures exceed 21°C or if the airflow is too strong. Controlled drying environments minimize this loss, ensuring the final product retains its distinctive aroma and effects. Curing Chemistry: During curing, residual moisture evaporates slowly, and cannabinoids continue to mature. This process enhances the smoothness and complexity of the smoke or vapour, with studies showing that extended curing can increase the conversion of inactive cannabinoid precursors into their active forms. Science also drives innovation. Techniques like vacuum-microwave drying and controlled-atmosphere curing chambers are emerging as tools to streamline these processes while preserving quality. These advancements ensure consistency, scalability, and efficiency—qualities essential for commercial cannabis production. Craftsmanship: The Art of Mastery While science provides the foundation, craftsmanship transforms cannabis drying and curing into an art form. Experienced growers develop an intuitive understanding of their plants, tailoring drying and curing methods to bring out the best in each cultivar. Cultivar-Specific Adjustments: Every cannabis strain has a unique chemical profile, and no two cultivars respond identically to drying and curing conditions. Skilled growers assess factors like bud density, terpene profiles, and resin production to adjust airflow, temperature, and humidity levels accordingly. Tactile Expertise: The ability to "read" a plant’s readiness for the next stage—whether it’s the snap of a stem during drying or the texture of buds during curing—is an invaluable skill honed through practice. This tactile approach ensures that the product is neither over-dried nor under-cured, preserving its optimal quality. The Element of Patience: Unlike the fast-paced nature of cultivation, curing requires patience. Master growers understand that rushing this process can compromise the flavour, potency, and overall experience. Their dedication to the craft ensures that every jar opened by a consumer delivers the intended quality. There are some growing cups that only permits flower that has been cured for a minimum of 6 months. So just think about that. Synergy of Science and Art The true magic of drying and curing lies in the synergy of science and craftsmanship. While scientific principles establish the parameters for success, it is the grower’s hands-on approach and experience that ensures the process achieves its full potential. As cannabis growers, the drying and curing stages are where your hard work truly transforms into a masterpiece. By understanding the nuances of these processes and tailoring them to your specific environment and strains, you can ensure top-tier quality in every harvest. Next week, we’ll delve deeper into the advanced techniques and technologies reshaping the drying and curing landscape. We will talk about wet trimming and dry trimming. Things like the box dryer and even the Curidor. Until then, remember: cannabis cultivation is a blend of science, craftsmanship, and passion—just like drying and curing, it’s all about finding the perfect balance.

Curing Process

Use airtight containers like glass jars to retain the terpene profile and cannabinoids while controlling residual moisture. This process should take time. There is no need to rush the curing process as it is the last effort required to lock in all the goodness the flower has to offer. I always say, there are a thousand ways to skin a cat. And when I look at different growers doing different drying and curing techniques it’s hard to just say this is wrong and this is best. What all growers are trying to achieve during the process is the same. 

As long as you have an understanding of what it is you are trying to achieve, your methods to your madness are your own. Some people burp jars in the first few weeks to let the last moisture out of the jars and to ensure no mould can fester on the inside. This slower release of moisture in the jars aids in the curing process resulting in a smoother smoke. Other growers will say if the flower is releasing moisture then you havent dried it correctly…You decide which is which.

Considerations for Growers

Space Planning

Whether cultivating indoors, outdoors, or in a greenhouse, drying and curing requires dedicated, controlled environments. Consider modular drying racks or customized climate chambers for efficiency. Make sure you have enough space prior to growing the cannabis. Knowing what the drying and curing capacity of your space will also create less stress. There is nothing worse than not having enough space for all your cannabis. YOu will end up ruining all your cultivation efforts just due to lack of space or excitement to plant, whichever way you want to look at it.

Cultivar-Specific Approaches

Each strain or chemovar responds differently to drying conditions. Research suggests that controlled atmosphere chambers tailored to the cultivar’s chemical composition can optimize cannabinoid and terpene retention. I don’t doubt that this is a bit more advanced know-how and that not everyone will grasp this. But if you are learning from previous harvests then optimising your room from previous settings will only make your results better.

Scalability and Efficiency

Large-scale growers may benefit from integrating innovative methods like vacuum-microwave drying or controlled nitrogen environments to reduce processing time while preserving quality. On large-scale operations ,it is important that things flow consistently, and not having space is not an option, So for those that can afford this investment, it really is a game changer. 

Drying and Curing Cannabis: The Art of Post-Harvest Perfection As we turn the page to another chapter in our cannabis cultivation journey, it’s time to explore one of the most crucial post-harvest stages: drying and curing. These processes define the quality, potency, and overall experience of your final product. Last week, we reflected on the dynamic relationship between cannabis and hemp, bridging our understanding of its versatility. This week, we focus on how growers can harness the art and science of drying and curing to preserve the best of what cannabis has to offer. Drying and Curing: Understanding the Differences Though often mentioned in tandem, drying and curing serve distinct roles in post-harvest processing: Drying: This initial step removes excess moisture from the harvested cannabis to prevent mould and decay. Proper drying stabilizes the plant material, preparing it for long-term storage and further processing. According to recent studies, factors like temperature, humidity, and airflow significantly influence the retention of cannabinoids and terpenes during drying​ Curing: Curing comes after drying and involves slow maturation of the cannabis in controlled conditions. This process enhances the chemical complexity of the cannabinoids and terpenes while improving flavour, aroma, and smoothness. It’s akin to ageing fine wine—patience is key for premium results​ ​ Key Components for Success To master drying and curing, growers must carefully balance several critical factors. This can take many seasons to figure out and it is important to recognise that when you are just getting started being in control of all factors can be tricky. Try and get the following down. Harvest Timing Timing is everything. Trichome maturity dictates the peak potency and flavour profile. Harvesting too early or late can drastically affect the final quality​. There are many ways to determine harvest readiness. When looking at an overall bro-science approach, growers check trichomes on flowers with a jeweller loop. Looking at the concentration of trichomes and their maturity, some want to see a ratio of 10% amber to milky trichomes when looking at a selected area on the plant. Drying Environment Room Size: The space in which you decide to do your post-harvesting is crucial. The room needs to be clean, dry, and dark. You also need to consider the overall space of the room compared to your harvest. Cramming too much produce in a room can cause issues, as can having too much space for not that much produce. Temperature: Optimal ranges between 16–21°C to avoid terpene evaporation while ensuring moisture reduction. This too can be easier said than done. Most times growers select a space that they have the least control over and or is in too much direct sunlight. Your temps can be controlled by an A/C unit too, but consider what it would do to your electricity bill and if the size of the Aircon unit you can afford will work for your room. Humidity: Keeping relative humidity (RH) at 50–60% minimises mould risk and promotes even drying. This will also ensure that your curing process is more stable and consistent. When relative humidity fluctuates too much during drying, the problems it can cause, even in ideal temperatures, cannot be ignored. It's so important not to have drastic changes in these. Airflow: Gentle circulation prevents moisture buildup without damaging the trichomes, the tiny structures rich in cannabinoids and terpenes​. It also helps avoid mould, but if done incorrectly, it can aid in drying the cannabis too fast, which can cause flavour and effect imbalances. . Curing Process Use airtight containers like glass jars to retain the terpene profile and cannabinoids while controlling residual moisture. This process should take time. There is no need to rush the curing process as it is the last effort required to lock in all the goodness the flower has to offer. I always say, there are a thousand ways to skin a cat. And when I look at different growers doing different drying and curing techniques it's hard to just say this is wrong and this is best. What all growers are trying to achieve during the process is the same. As long as you have an understanding of what it is you are trying to achieve, your methods to your madness are your own. Some people burp jars in the first few weeks to let the last moisture out of the jars and to ensure no mould can fester on the inside. This slower release of moisture in the jars aids in the curing process resulting in a smoother smoke. Other growers will say if the flower is releasing moisture then you havent dried it correctly…You decide which is which. . Considerations for Growers Space Planning Whether cultivating indoors, outdoors, or in a greenhouse, drying and curing requires dedicated, controlled environments. Consider modular drying racks or customized climate chambers for efficiency​. Make sure you have enough space prior to you growing the cannabis. Know what the drying and curing capacity is of your space will also create less stress. There is nothing worse than not having enough space for all your cannabis. YOu will end up ruining all your cultivation efforts just due to lack of space or excitement to plant, whichever way you want to look at it. Cultivar-Specific Approaches Each strain or chemovar responds differently to drying conditions. Research suggests that controlled atmosphere chambers tailored to the cultivar’s chemical composition can optimize cannabinoid and terpene retention​. I don’t doubt that this is a bit more advanced know how and that not everyone will grasp this. But if you are learning from previous harvests then optimising your room from previous settings will only make your results better. . Scalability and Efficiency Large-scale growers may benefit from integrating innovative methods like vacuum-microwave drying or controlled nitrogen environments to reduce processing time while preserving quality​. On large scale operations it is important that things flow consistantly, and not having space is not an option, So for those that can afford this investment it really is a gam changer. The Role of Science in cannabis drying and curing Drying and curing cannabis is where science meets art, blending precise environmental controls with intuitive craftsmanship honed through experience. Each stage is a delicate balance of preserving the plant’s biochemical integrity while enhancing its sensory and medicinal qualities. The Foundation of Precision Scientific research provides invaluable insights into the optimal conditions for drying and curing cannabis. Key studies highlight how cannabinoids and terpenes—critical to the plant’s potency, flavour, and therapeutic effects—are highly sensitive to temperature, humidity, and oxygen exposure. For example: Cannabinoid Preservation: THC and CBD degrade under excessive heat or prolonged light exposure. Scientific studies recommend temperatures between 16–21°C to stabilize these compounds during drying. Terpene Retention: Terpenes, which are volatile organic compounds, evaporate easily if temperatures exceed 21°C or if the airflow is too strong. Controlled drying environments minimize this loss, ensuring the final product retains its distinctive aroma and effects. Curing Chemistry: During curing, residual moisture evaporates slowly, and cannabinoids continue to mature. This process enhances the smoothness and complexity of the smoke or vapour, with studies showing that extended curing can increase the conversion of inactive cannabinoid precursors into their active forms. Science also drives innovation. Techniques like vacuum-microwave drying and controlled-atmosphere curing chambers are emerging as tools to streamline these processes while preserving quality. These advancements ensure consistency, scalability, and efficiency—qualities essential for commercial cannabis production. Craftsmanship: The Art of Mastery While science provides the foundation, craftsmanship transforms cannabis drying and curing into an art form. Experienced growers develop an intuitive understanding of their plants, tailoring drying and curing methods to bring out the best in each cultivar. Cultivar-Specific Adjustments: Every cannabis strain has a unique chemical profile, and no two cultivars respond identically to drying and curing conditions. Skilled growers assess factors like bud density, terpene profiles, and resin production to adjust airflow, temperature, and humidity levels accordingly. Tactile Expertise: The ability to "read" a plant’s readiness for the next stage—whether it’s the snap of a stem during drying or the texture of buds during curing—is an invaluable skill honed through practice. This tactile approach ensures that the product is neither over-dried nor under-cured, preserving its optimal quality. The Element of Patience: Unlike the fast-paced nature of cultivation, curing requires patience. Master growers understand that rushing this process can compromise the flavour, potency, and overall experience. Their dedication to the craft ensures that every jar opened by a consumer delivers the intended quality. There are some growing cups that only permits flower that has been cured for a minimum of 6 months. So just think about that. Synergy of Science and Art The true magic of drying and curing lies in the synergy of science and craftsmanship. While scientific principles establish the parameters for success, it is the grower’s hands-on approach and experience that ensures the process achieves its full potential. As cannabis growers, the drying and curing stages are where your hard work truly transforms into a masterpiece. By understanding the nuances of these processes and tailoring them to your specific environment and strains, you can ensure top-tier quality in every harvest. Next week, we’ll delve deeper into the advanced techniques and technologies reshaping the drying and curing landscape. We will talk about wet trimming and dry trimming. Things like the box dryer and even the Curidor. Until then, remember: cannabis cultivation is a blend of science, craftsmanship, and passion—just like drying and curing, it’s all about finding the perfect balance.

The Role of Science in cannabis drying and curing

Drying and curing cannabis is where science meets art, blending precise environmental controls with intuitive craftsmanship honed through experience. Each stage is a delicate balance of preserving the plant’s biochemical integrity while enhancing its sensory and medicinal qualities.

The Foundation of Precision

Scientific research provides invaluable insights into the optimal conditions for drying and curing cannabis. Key studies highlight how cannabinoids and terpenes—critical to the plant’s potency, flavour, and therapeutic effects—are highly sensitive to temperature, humidity, and oxygen exposure. For example:

Cannabinoid Preservation: THC and CBD degrade under excessive heat or prolonged light exposure. Scientific studies recommend temperatures between 16–21°C to stabilize these compounds during drying.

Terpene Retention: Terpenes, which are volatile organic compounds, evaporate easily if temperatures exceed 21°C or if the airflow is too strong. Controlled drying environments minimize this loss, ensuring the final product retains its distinctive aroma and effects.

Curing Chemistry: During curing, residual moisture evaporates slowly, and cannabinoids continue to mature. This process enhances the smoothness and complexity of the smoke or vapour, with studies showing that extended curing can increase the conversion of inactive cannabinoid precursors into their active forms.

Science also drives innovation. Techniques like vacuum-microwave drying and controlled-atmosphere curing chambers are emerging as tools to streamline these processes while preserving quality. These advancements ensure consistency, scalability, and efficiency—qualities essential for commercial cannabis production.

Drying and Curing Cannabis: The Art of Post-Harvest Perfection As we turn the page to another chapter in our cannabis cultivation journey, it’s time to explore one of the most crucial post-harvest stages: drying and curing. These processes define the quality, potency, and overall experience of your final product. Last week, we reflected on the dynamic relationship between cannabis and hemp, bridging our understanding of its versatility. This week, we focus on how growers can harness the art and science of drying and curing to preserve the best of what cannabis has to offer. Drying and Curing: Understanding the Differences Though often mentioned in tandem, drying and curing serve distinct roles in post-harvest processing: Drying: This initial step removes excess moisture from the harvested cannabis to prevent mould and decay. Proper drying stabilizes the plant material, preparing it for long-term storage and further processing. According to recent studies, factors like temperature, humidity, and airflow significantly influence the retention of cannabinoids and terpenes during drying​ Curing: Curing comes after drying and involves slow maturation of the cannabis in controlled conditions. This process enhances the chemical complexity of the cannabinoids and terpenes while improving flavour, aroma, and smoothness. It’s akin to ageing fine wine—patience is key for premium results​ ​ Key Components for Success To master drying and curing, growers must carefully balance several critical factors. This can take many seasons to figure out and it is important to recognise that when you are just getting started being in control of all factors can be tricky. Try and get the following down. Harvest Timing Timing is everything. Trichome maturity dictates the peak potency and flavour profile. Harvesting too early or late can drastically affect the final quality​. There are many ways to determine harvest readiness. When looking at an overall bro-science approach, growers check trichomes on flowers with a jeweller loop. Looking at the concentration of trichomes and their maturity, some want to see a ratio of 10% amber to milky trichomes when looking at a selected area on the plant. Drying Environment Room Size: The space in which you decide to do your post-harvesting is crucial. The room needs to be clean, dry, and dark. You also need to consider the overall space of the room compared to your harvest. Cramming too much produce in a room can cause issues, as can having too much space for not that much produce. Temperature: Optimal ranges between 16–21°C to avoid terpene evaporation while ensuring moisture reduction. This too can be easier said than done. Most times growers select a space that they have the least control over and or is in too much direct sunlight. Your temps can be controlled by an A/C unit too, but consider what it would do to your electricity bill and if the size of the Aircon unit you can afford will work for your room. Humidity: Keeping relative humidity (RH) at 50–60% minimises mould risk and promotes even drying. This will also ensure that your curing process is more stable and consistent. When relative humidity fluctuates too much during drying, the problems it can cause, even in ideal temperatures, cannot be ignored. It's so important not to have drastic changes in these. Airflow: Gentle circulation prevents moisture buildup without damaging the trichomes, the tiny structures rich in cannabinoids and terpenes​. It also helps avoid mould, but if done incorrectly, it can aid in drying the cannabis too fast, which can cause flavour and effect imbalances. . Curing Process Use airtight containers like glass jars to retain the terpene profile and cannabinoids while controlling residual moisture. This process should take time. There is no need to rush the curing process as it is the last effort required to lock in all the goodness the flower has to offer. I always say, there are a thousand ways to skin a cat. And when I look at different growers doing different drying and curing techniques it's hard to just say this is wrong and this is best. What all growers are trying to achieve during the process is the same. As long as you have an understanding of what it is you are trying to achieve, your methods to your madness are your own. Some people burp jars in the first few weeks to let the last moisture out of the jars and to ensure no mould can fester on the inside. This slower release of moisture in the jars aids in the curing process resulting in a smoother smoke. Other growers will say if the flower is releasing moisture then you havent dried it correctly…You decide which is which. . Considerations for Growers Space Planning Whether cultivating indoors, outdoors, or in a greenhouse, drying and curing requires dedicated, controlled environments. Consider modular drying racks or customized climate chambers for efficiency​. Make sure you have enough space prior to you growing the cannabis. Know what the drying and curing capacity is of your space will also create less stress. There is nothing worse than not having enough space for all your cannabis. YOu will end up ruining all your cultivation efforts just due to lack of space or excitement to plant, whichever way you want to look at it. Cultivar-Specific Approaches Each strain or chemovar responds differently to drying conditions. Research suggests that controlled atmosphere chambers tailored to the cultivar’s chemical composition can optimize cannabinoid and terpene retention​. I don’t doubt that this is a bit more advanced know how and that not everyone will grasp this. But if you are learning from previous harvests then optimising your room from previous settings will only make your results better. . Scalability and Efficiency Large-scale growers may benefit from integrating innovative methods like vacuum-microwave drying or controlled nitrogen environments to reduce processing time while preserving quality​. On large scale operations it is important that things flow consistantly, and not having space is not an option, So for those that can afford this investment it really is a gam changer. The Role of Science in cannabis drying and curing Drying and curing cannabis is where science meets art, blending precise environmental controls with intuitive craftsmanship honed through experience. Each stage is a delicate balance of preserving the plant’s biochemical integrity while enhancing its sensory and medicinal qualities. The Foundation of Precision Scientific research provides invaluable insights into the optimal conditions for drying and curing cannabis. Key studies highlight how cannabinoids and terpenes—critical to the plant’s potency, flavour, and therapeutic effects—are highly sensitive to temperature, humidity, and oxygen exposure. For example: Cannabinoid Preservation: THC and CBD degrade under excessive heat or prolonged light exposure. Scientific studies recommend temperatures between 16–21°C to stabilize these compounds during drying. Terpene Retention: Terpenes, which are volatile organic compounds, evaporate easily if temperatures exceed 21°C or if the airflow is too strong. Controlled drying environments minimize this loss, ensuring the final product retains its distinctive aroma and effects. Curing Chemistry: During curing, residual moisture evaporates slowly, and cannabinoids continue to mature. This process enhances the smoothness and complexity of the smoke or vapour, with studies showing that extended curing can increase the conversion of inactive cannabinoid precursors into their active forms. Science also drives innovation. Techniques like vacuum-microwave drying and controlled-atmosphere curing chambers are emerging as tools to streamline these processes while preserving quality. These advancements ensure consistency, scalability, and efficiency—qualities essential for commercial cannabis production. Craftsmanship: The Art of Mastery While science provides the foundation, craftsmanship transforms cannabis drying and curing into an art form. Experienced growers develop an intuitive understanding of their plants, tailoring drying and curing methods to bring out the best in each cultivar. Cultivar-Specific Adjustments: Every cannabis strain has a unique chemical profile, and no two cultivars respond identically to drying and curing conditions. Skilled growers assess factors like bud density, terpene profiles, and resin production to adjust airflow, temperature, and humidity levels accordingly. Tactile Expertise: The ability to "read" a plant’s readiness for the next stage—whether it’s the snap of a stem during drying or the texture of buds during curing—is an invaluable skill honed through practice. This tactile approach ensures that the product is neither over-dried nor under-cured, preserving its optimal quality. The Element of Patience: Unlike the fast-paced nature of cultivation, curing requires patience. Master growers understand that rushing this process can compromise the flavour, potency, and overall experience. Their dedication to the craft ensures that every jar opened by a consumer delivers the intended quality. There are some growing cups that only permits flower that has been cured for a minimum of 6 months. So just think about that. Synergy of Science and Art The true magic of drying and curing lies in the synergy of science and craftsmanship. While scientific principles establish the parameters for success, it is the grower’s hands-on approach and experience that ensures the process achieves its full potential. As cannabis growers, the drying and curing stages are where your hard work truly transforms into a masterpiece. By understanding the nuances of these processes and tailoring them to your specific environment and strains, you can ensure top-tier quality in every harvest. Next week, we’ll delve deeper into the advanced techniques and technologies reshaping the drying and curing landscape. We will talk about wet trimming and dry trimming. Things like the box dryer and even the Curidor. Until then, remember: cannabis cultivation is a blend of science, craftsmanship, and passion—just like drying and curing, it’s all about finding the perfect balance.

Craftsmanship: The Art of Mastery

While science provides the foundation, craftsmanship transforms cannabis drying and curing into an art form. Experienced growers develop an intuitive understanding of their plants, tailoring drying and curing methods to bring out the best in each cultivar.

Cultivar-Specific Adjustments:

Every cannabis strain has a unique chemical profile, and no two cultivars respond identically to drying and curing conditions. Skilled growers assess factors like bud density, terpene profiles, and resin production to adjust airflow, temperature, and humidity levels accordingly.

Tactile Expertise:

The ability to “read” a plant’s readiness for the next stage—whether it’s the snap of a stem during drying or the texture of buds during curing—is an invaluable skill honed through practice. This tactile approach ensures that the product is neither over-dried nor under-cured, preserving its optimal quality.

The Element of Patience:

Unlike the fast-paced nature of cultivation, curing requires patience. Master growers understand that rushing this process can compromise the flavour, potency, and overall experience. Their dedication to the craft ensures that every jar opened by a consumer delivers the intended quality. There are some growing cups that only permits flowers that has been cured for a minimum of 6 months. So just think about that. 

Synergy of Science and Art

The true magic of drying and curing lies in the synergy of science and craftsmanship. While scientific principles establish the parameters for success, it is the grower’s hands-on approach and experience that ensures the process achieves its full potential.

Drying and Curing Cannabis: The Art of Post-Harvest Perfection As we turn the page to another chapter in our cannabis cultivation journey, it’s time to explore one of the most crucial post-harvest stages: drying and curing. These processes define the quality, potency, and overall experience of your final product. Last week, we reflected on the dynamic relationship between cannabis and hemp, bridging our understanding of its versatility. This week, we focus on how growers can harness the art and science of drying and curing to preserve the best of what cannabis has to offer. Drying and Curing: Understanding the Differences Though often mentioned in tandem, drying and curing serve distinct roles in post-harvest processing: Drying: This initial step removes excess moisture from the harvested cannabis to prevent mould and decay. Proper drying stabilizes the plant material, preparing it for long-term storage and further processing. According to recent studies, factors like temperature, humidity, and airflow significantly influence the retention of cannabinoids and terpenes during drying​ Curing: Curing comes after drying and involves slow maturation of the cannabis in controlled conditions. This process enhances the chemical complexity of the cannabinoids and terpenes while improving flavour, aroma, and smoothness. It’s akin to ageing fine wine—patience is key for premium results​ ​ Key Components for Success To master drying and curing, growers must carefully balance several critical factors. This can take many seasons to figure out and it is important to recognise that when you are just getting started being in control of all factors can be tricky. Try and get the following down. Harvest Timing Timing is everything. Trichome maturity dictates the peak potency and flavour profile. Harvesting too early or late can drastically affect the final quality​. There are many ways to determine harvest readiness. When looking at an overall bro-science approach, growers check trichomes on flowers with a jeweller loop. Looking at the concentration of trichomes and their maturity, some want to see a ratio of 10% amber to milky trichomes when looking at a selected area on the plant. Drying Environment Room Size: The space in which you decide to do your post-harvesting is crucial. The room needs to be clean, dry, and dark. You also need to consider the overall space of the room compared to your harvest. Cramming too much produce in a room can cause issues, as can having too much space for not that much produce. Temperature: Optimal ranges between 16–21°C to avoid terpene evaporation while ensuring moisture reduction. This too can be easier said than done. Most times growers select a space that they have the least control over and or is in too much direct sunlight. Your temps can be controlled by an A/C unit too, but consider what it would do to your electricity bill and if the size of the Aircon unit you can afford will work for your room. Humidity: Keeping relative humidity (RH) at 50–60% minimises mould risk and promotes even drying. This will also ensure that your curing process is more stable and consistent. When relative humidity fluctuates too much during drying, the problems it can cause, even in ideal temperatures, cannot be ignored. It's so important not to have drastic changes in these. Airflow: Gentle circulation prevents moisture buildup without damaging the trichomes, the tiny structures rich in cannabinoids and terpenes​. It also helps avoid mould, but if done incorrectly, it can aid in drying the cannabis too fast, which can cause flavour and effect imbalances. . Curing Process Use airtight containers like glass jars to retain the terpene profile and cannabinoids while controlling residual moisture. This process should take time. There is no need to rush the curing process as it is the last effort required to lock in all the goodness the flower has to offer. I always say, there are a thousand ways to skin a cat. And when I look at different growers doing different drying and curing techniques it's hard to just say this is wrong and this is best. What all growers are trying to achieve during the process is the same. As long as you have an understanding of what it is you are trying to achieve, your methods to your madness are your own. Some people burp jars in the first few weeks to let the last moisture out of the jars and to ensure no mould can fester on the inside. This slower release of moisture in the jars aids in the curing process resulting in a smoother smoke. Other growers will say if the flower is releasing moisture then you havent dried it correctly…You decide which is which. . Considerations for Growers Space Planning Whether cultivating indoors, outdoors, or in a greenhouse, drying and curing requires dedicated, controlled environments. Consider modular drying racks or customized climate chambers for efficiency​. Make sure you have enough space prior to you growing the cannabis. Know what the drying and curing capacity is of your space will also create less stress. There is nothing worse than not having enough space for all your cannabis. YOu will end up ruining all your cultivation efforts just due to lack of space or excitement to plant, whichever way you want to look at it. Cultivar-Specific Approaches Each strain or chemovar responds differently to drying conditions. Research suggests that controlled atmosphere chambers tailored to the cultivar’s chemical composition can optimize cannabinoid and terpene retention​. I don’t doubt that this is a bit more advanced know how and that not everyone will grasp this. But if you are learning from previous harvests then optimising your room from previous settings will only make your results better. . Scalability and Efficiency Large-scale growers may benefit from integrating innovative methods like vacuum-microwave drying or controlled nitrogen environments to reduce processing time while preserving quality​. On large scale operations it is important that things flow consistantly, and not having space is not an option, So for those that can afford this investment it really is a gam changer. The Role of Science in cannabis drying and curing Drying and curing cannabis is where science meets art, blending precise environmental controls with intuitive craftsmanship honed through experience. Each stage is a delicate balance of preserving the plant’s biochemical integrity while enhancing its sensory and medicinal qualities. The Foundation of Precision Scientific research provides invaluable insights into the optimal conditions for drying and curing cannabis. Key studies highlight how cannabinoids and terpenes—critical to the plant’s potency, flavour, and therapeutic effects—are highly sensitive to temperature, humidity, and oxygen exposure. For example: Cannabinoid Preservation: THC and CBD degrade under excessive heat or prolonged light exposure. Scientific studies recommend temperatures between 16–21°C to stabilize these compounds during drying. Terpene Retention: Terpenes, which are volatile organic compounds, evaporate easily if temperatures exceed 21°C or if the airflow is too strong. Controlled drying environments minimize this loss, ensuring the final product retains its distinctive aroma and effects. Curing Chemistry: During curing, residual moisture evaporates slowly, and cannabinoids continue to mature. This process enhances the smoothness and complexity of the smoke or vapour, with studies showing that extended curing can increase the conversion of inactive cannabinoid precursors into their active forms. Science also drives innovation. Techniques like vacuum-microwave drying and controlled-atmosphere curing chambers are emerging as tools to streamline these processes while preserving quality. These advancements ensure consistency, scalability, and efficiency—qualities essential for commercial cannabis production. Craftsmanship: The Art of Mastery While science provides the foundation, craftsmanship transforms cannabis drying and curing into an art form. Experienced growers develop an intuitive understanding of their plants, tailoring drying and curing methods to bring out the best in each cultivar. Cultivar-Specific Adjustments: Every cannabis strain has a unique chemical profile, and no two cultivars respond identically to drying and curing conditions. Skilled growers assess factors like bud density, terpene profiles, and resin production to adjust airflow, temperature, and humidity levels accordingly. Tactile Expertise: The ability to "read" a plant’s readiness for the next stage—whether it’s the snap of a stem during drying or the texture of buds during curing—is an invaluable skill honed through practice. This tactile approach ensures that the product is neither over-dried nor under-cured, preserving its optimal quality. The Element of Patience: Unlike the fast-paced nature of cultivation, curing requires patience. Master growers understand that rushing this process can compromise the flavour, potency, and overall experience. Their dedication to the craft ensures that every jar opened by a consumer delivers the intended quality. There are some growing cups that only permits flower that has been cured for a minimum of 6 months. So just think about that. Synergy of Science and Art The true magic of drying and curing lies in the synergy of science and craftsmanship. While scientific principles establish the parameters for success, it is the grower’s hands-on approach and experience that ensures the process achieves its full potential. As cannabis growers, the drying and curing stages are where your hard work truly transforms into a masterpiece. By understanding the nuances of these processes and tailoring them to your specific environment and strains, you can ensure top-tier quality in every harvest. Next week, we’ll delve deeper into the advanced techniques and technologies reshaping the drying and curing landscape. We will talk about wet trimming and dry trimming. Things like the box dryer and even the Curidor. Until then, remember: cannabis cultivation is a blend of science, craftsmanship, and passion—just like drying and curing, it’s all about finding the perfect balance.

As cannabis growers, the drying and curing stages are where your hard work truly transforms into a masterpiece. By understanding the nuances of these processes and tailoring them to your specific environment and strains, you can ensure top-tier quality in every harvest.

Next week, we’ll delve deeper into the advanced techniques and technologies reshaping the drying and curing landscape. We will talk about wet trimming and dry trimming. Things like the box dryer and even the Curidor. Until then, remember: cannabis cultivation is a blend of science, craftsmanship, and passion—just like drying and curing, it’s all about finding the perfect balance.

Posted on

Environmental Control for Cannabis Cultivation

Environmental Control for Cannabis Cultivation

Successful cannabis cultivation is rooted in a delicate balance of environmental factors. While soil quality and nutrients often take centre stage, environmental controls such as light, temperature, humidity, and airflow are equally vital to the health and productivity of your plants. These factors do not just influence plant growth; they define the boundaries within which cannabis can thrive.

Environmental control is the cornerstone of creating optimal growing conditions, whether indoors, outdoors, or in a greenhouse. By managing these elements effectively, growers can maximise yields, reduce or increase plant stress, and ensure consistent cannabinoid and terpene profiles.

Last week we discussed micronutrients. I will in the future go more in-depth on micronutrients and their importance, but This week. I wanted to shift focus as I mentioned, to the environment. How we control it and how this affects our overall outcomes. The seasons are without a doubt intensifying. The summers are hotter, the winters are colder and the rains are just not like they were. Let’s talk about what you should consider when cultivating cannabis and how you can go about controlling as much as possible to maximise your output.

environmental controls for cannabis

Light: The Driving Force of Growth

Light is the foundation of photosynthesis, the process through which cannabis and all plants convert light energy into the sugars necessary for growth. The intensity, duration, and spectrum of light all play critical roles in determining plant health and yield.

Indoor growers rely on artificial lighting systems such as LEDs and HPS lamps, which allow precise control over light cycles and intensity. LEDs, in particular, have gained popularity due to their energy efficiency and ability to provide targeted light spectrums. Technology can be misleading however due to the misconceptions of Watts and Micromole outputs etc. But we will get to the lights conversation in the near future. Regardless, indoor lighting provides various considerations for the overall environment. From heat output, reflective light, light intensity and overall spectrum these factors will result in growers having to invest in other inputs to control or compensate for the lights’ input in the environment.

Greenhouse cultivators have the advantage of natural sunlight, supplemented with artificial lighting during shorter days. Light deprivation systems are often employed to control flowering times, enabling multiple harvests in a single year. This is the ideal situation for greenhouse cultivators but is also the most costly. Outdoor growers, fully dependent on natural sunlight, must plan planting schedules around seasonal light cycles to maximize exposure and growth. Some growers will put up some extra lights in the outdoor patches to lengthen the veg cycle slightly but with the disadvantage of the greenhouse plastic that helps the light bounce and reflect. It can sometimes end up being counterproductive if done incorrectly.

Environmental Control for Cannabis Cultivation

Temperature: The Silent Regulator

Temperature regulation is critical for maintaining optimal metabolic activity in cannabis plants. Cannabis thrives within a temperature range of 20–30°C  during the day, with a slight drop at night. Deviations from this range can lead to stress, reduced photosynthetic efficiency, and stunted growth.

Indoor growers use HVAC systems, and A/C units to maintain consistent temperatures, while greenhouse growers rely on ventilation and shading to moderate temperature fluctuations. This can prove to be extremely difficult if not set up correctly or if the location is not ideal. In certain parts of our country, a greenhouse is just not an option while in other parts using shade cloth doesn’t do much. Outdoors, and growers often mitigate extreme temperatures with shade cloths, frost covers, or site selection to protect plants from harsh conditions. 

The impact of temperature on cannabis extends beyond growth. Cooler nighttime temperatures during flowering can enhance the expression of anthocyanins, resulting in colourful buds, while heat stress can degrade terpenes, reducing flavour and aroma. Some growers in the indoor setting will purposefully keep the rooms cooler or even pack ice on the base of plants to enhance this expression.

Humidity: The Balancing Act

Humidity plays a vital role in cannabis cultivation, influencing water uptake, nutrient transport, and pest management. During the seedling and vegetative stages, higher humidity levels (60–70%) promote healthy growth. However, as plants enter the flowering stage, reducing humidity to 40–50% minimizes the risk of mould and mildew on dense buds.

Indoor growers use humidifiers, dehumidifiers, and hygrometers to maintain precise control over humidity levels. With awesome technology available, today, there are even quantum sensors… More on that in a bit. In greenhouses, natural ventilation and exhaust fans help regulate moisture, while outdoor growers depend on proper plant spacing and pruning to encourage airflow and reduce localized humidity.

Environmental Controls for cannabis

Airflow and CO₂ Management

Airflow ensures the exchange of gases, preventing stagnation and creating a stable microclimate around cannabis plants. Proper air circulation reduces the risk of fungal diseases and helps strengthen plant stems, preparing them to support heavy flowers during the later stages of growth.

Indoor growers use oscillating fans and exhaust systems to circulate air, while greenhouse setups often employ automated vents and fan systems. Outdoor growers rely on natural breezes but can enhance airflow by strategically pruning plants and avoiding overcrowding.

Supplementing CO₂ can further enhance photosynthesis and yield. Greenhouses and indoor growers often introduce CO₂ enrichment during the vegetative and early flowering stages, boosting plant growth by up to 20%.

If at some point you wanted me to mention VPD(vapour pressure deficit) then I apologise. I will go in-depth on all topics very soon. But for now, this is how we will keep things.

Environmental Conrtols for Cannabis

Integrating Environmental Controls Across Cultivation Settings

Indoor cultivation offers the highest degree of environmental control, allowing growers to manipulate every factor to suit the specific needs of their cannabis plants. From programmable lighting systems to automated HVAC units, technology provides precision and consistency. All at a cost. This has never been a cheap effort so please consider this.

Greenhouses offer a hybrid approach, combining natural light and airflow with controlled systems to stabilize temperature, humidity, and light cycles. This balance reduces energy costs while providing a productive environment for year-round cultivation.

Outdoor cultivation, while more exposed to environmental variables, benefits from careful planning and site selection. By leveraging natural elements and mitigating extremes, outdoor growers can produce high-quality cannabis with minimal environmental impact.

Challenges and Solutions in Environmental Control

Maintaining optimal environmental conditions is not without challenges. Indoor growers face high energy costs, particularly for lighting and climate control. Greenhouses require regular maintenance of ventilation and shading systems, while outdoor growers must contend with unpredictable weather.

Technological advancements, such as automated monitoring systems and precision agriculture tools, are transforming how growers approach these challenges. Sensors for temperature, humidity, and light intensity provide real-time data, enabling growers to adjust conditions proactively. Even in the outdoor setting, we have seen precision agricultural tools being used to the benefit of the grower.

Environmental control is the linchpin of cannabis cultivation, bridging the gap between potential and performance. By understanding and managing factors like light, temperature, humidity, and airflow, growers create a stable environment that supports vigorous growth, high yields, and consistent quality.

Whether you are cultivating indoors, in a greenhouse, or outdoors, the principles of environmental control remain the same. Mastering these elements not only enhances your harvest but also elevates the entire growing experience, connecting you to the dynamic interplay between plants and their environment.

Posted on

Composting, How it works

Composting, how it works

In the past weeks, we’ve delved into everything from propagation techniques to plant training strategies. This week, as your cannabis plants continue to grow, it’s time to focus on one of the foundational practices that can significantly enhance their health and yield: composting. Composting is a simple, natural way to enrich your soil, and it’s an investment that pays off over time. With methods like hot composting, Hugelkultur, and bokashi, you have several options to suit your needs, each bringing unique benefits to your cannabis cultivation.

While creating compost may seem straightforward, it can become time-consuming on a larger scale without efficient tools. Let’s explore how to get started with composting, the different techniques available, and the best ways to manage raw materials for a successful composting process that supports your cannabis garden.

composting, how it works

The Basics of Composting: Transforming Waste into Vital Nutrients

Composting is a natural process where organic materials decompose to form a nutrient-rich substance that resembles humus. Through aerobic decomposition, microorganisms break down green (nitrogen-rich) and brown (carbon-rich) materials, turning waste into compost. This final product, packed with microbes and essential nutrients, enhances soil structure, aids water retention, and stimulates root growth—perfect for cannabis cultivation.

Hot composting is a highly efficient way to create compost. This method relies on maintaining a high temperature within the compost pile to speed up decomposition. Hot composting, as described in your resources, can yield garden-ready compost in as little as three months if managed well. This quick turnaround makes it ideal for cannabis growers who need a steady supply of compost.

Hot Composting: Quick, Effective, and Full of Nutrients

Though labour-intensive, hot composting is one of the fastest and most effective methods. Here’s how to get started:

Layer materials: Begin with a foundation of brown materials (like straw or dried leaves), alternating layers of greens (like vegetable scraps or fresh grass clippings) with browns to maintain a balanced carbon-to-nitrogen ratio. Make sure to keep the Browns material to a small size. Having large wood pieces will slow the quick composting down. So do your best to have twigs and sticks as small as possible. 

Maintain moisture: The pile should be moist but not soaking; aim for the feel of a wrung-out sponge. I always say, to start by adding water to the piles as you build them. Not too much but wet everything as you build your brown layers.

Incorporate some dirt or Soil: Adding in a small amount of dirt with your brown layers will help with moisture but also beef up your compost pile. Make sure that the dirt does not exceed 10% of the total browns. 

Monitor temperature: Use a compost thermometer to ensure the pile reaches around 55–60°C. When it hits this range, turn the pile to aerate it and regulate heat.

Turn regularly: Flip the pile each time it hits the ideal temperature range, usually every few days.

By following these steps, you’ll have nutrient-rich compost in 2–3 weeks, perfect for the soil. Or even as a top dress for your growing plants. More advanced growers will use this compost in their compost teas, ensuring the bioavailability of the nutrients. 

composting, how it works

Hugelkultur: Long-Lasting Nutrients and Moisture Retention

Hugelkultur is a unique form of composting that’s perfect for cannabis gardens requiring long-lasting, slow-releasing nutrients. Originating from German permaculture, Hugelkultur involves burying large logs or branches at the base of a planting bed, which slowly decomposes over time. This decomposition provides a continuous source of nutrients and helps retain moisture, reducing the need for frequent watering.

Over the years, the sophistication of Hugelkultur’s have gotten better. Consider not only adding large wood pieces at the bottom but also some stones too. Over time this will also provide minerals to the soil as it breaks down slowly over time. The higher up the Hugelkultur is built the smaller the materials are that make up each layer. In the end, it will be a little mound that will be able to sustain life perpetually over time with very minimal inputs. 

Composting, how it works

This method is ideal for outdoor cannabis growers who want a sustainable, low-maintenance approach to soil enrichment. As the wood breaks down, it becomes a natural sponge, holding water and releasing nutrients slowly—making it an excellent foundation for cannabis plants that require consistent moisture and nutrient availability.

Bokashi: A Fermentation-Based Approach

Bokashi composting is an anaerobic (oxygen-free) fermentation process, perfect for indoor composting or small spaces. By adding a microbial inoculant, typically a mixture of lactic acid bacteria, yeast, and other beneficial microbes, bokashi breaks down organic material without odour. This method is ideal for home growers who need a compact solution for composting kitchen scraps.

The fermented material from bokashi can be added to your compost pile or buried directly in the soil. It speeds up the composting process and enriches the soil, especially beneficial for cannabis roots that thrive in a microbe-rich environment. Bokashi’s compact process also makes it accessible for those with limited space. You can find various types of Bokashi compost bins for home use online. Building one can be simple too. The main thing is to use an effective microbial solution to break down your scraps. Also, make sure that you can drain liquid strain from the Bin. this will be gold for Compost teas too.

Composting, how it works

Fish Hydrolysate: A Nutrient-Rich Boost for Your Cannabis

Fish hydrolysate, a liquid fertilizer made from whole fish or fish waste, is another excellent compost addition. It’s rich in nitrogen, amino acids, and minerals that support robust growth and flowering in cannabis plants. Unlike traditional fish emulsion, fish hydrolysate is cold-processed, retaining more nutrients.

However, making this is not really ideal for your neighbours and the smell can be overwhelming. So please be mindful if you are going to attempt this. Whole fish with a little bit of water crushed, mixed with unsulphured molasses. Good luck.

For cannabis growers, adding fish hydrolysate to compost or directly to soil can enhance microbial activity and enrich nutrient levels. Just remember that fish products can attract pests, so take care when applying them outdoors. You can also look at buying quality fish hydrolysate from reputable brands already established in our country.

Handling Raw Manure: High in Nutrients, But Use with Care

Raw manure is a powerful nitrogen source but requires careful handling due to potential pathogens and its tendency to burn plants if applied fresh. When composted properly, manure can be transformed into a safe, effective fertilizer that’s perfect for cannabis.

If this is the route you are going. Ensure that you pile up all the manure together in a big enough pile for it to generate heat. At least a cubic meter in height. Make sure, just like with the quick hot compost that the manure is not too wet, if it is add some dirty, straw or dry leaves to it. Monitoring the pile will be important so having the tools to measure the temperature. Unlike with the Hot compost pile, you need to kill pathogens so avoid touching it with your hands and have a thermometer at hand. Once the pile reaches the ideal temperature, start turning it. Once the entire pile has been turned and left to reach the temperature, has no odor and is blackish in colour it will be ready to use in your gardens.

Composting, How it works

Making Compost Work for Your Cannabis Garden

From hot composting to the innovative Hugelkultur and bokashi methods, composting offers cannabis growers a sustainable, effective way to boost soil health. Creating your own compost is simple, but as your scale increases, it can become time-consuming without efficient tools or systems. However, the results— richer soil, healthier roots, and more robust plants—are well worth the investment.

Taking the time to understand and implement these composting methods is a gift to your cannabis garden. Not only will it enhance the growth of your plants, but it also brings a deep sense of connection to the natural processes that sustain them.

Posted on

Why Transplanting Matters for Cannabis Plants

why transplanting matters for cannabis plants

In last week’s blog, we explored the importance of male cannabis plants and their role in breeding and genetic preservation. This week, we’re shifting our focus to a critical practice that can make or break your harvest—transplanting. Knowing when and how to transplant your cannabis plants can significantly affect their overall size and yield. After all, the saying goes, “The size of the roots equals the size of the fruits.”

Healthy roots lead to stronger plants, bigger flowers, and, ultimately, a more successful harvest. Whether you’re growing cannabis in soil, coco, or even a single-size rockwool cube, understanding the transplanting process can help you maximize the potential of your crop.

why transplanting matters for cannabis plants

Why Is Transplanting Cannabis Plants So Important?

Transplanting is essential for giving your plants the room they need to develop healthy and expansive root systems. In solid mediums like soil or coco, cannabis roots can become root-bound—when roots have grown to the point of encircling the inside of the pot, limiting further growth. Root-bound plants will slow down in vegetative growth, which in turn limits their ability to produce large, resinous buds. 

By transplanting your cannabis plants into larger containers at key points in their growth, you allow the roots to spread out, absorb more nutrients, and support bigger plants with more abundant yields.

How Often Should You Transplant Cannabis Plants?

Generally, you’ll want to transplant your cannabis plants 2–3 times during their life cycle. While some growers prefer to plant directly into larger pots, this can lead to waterlogging and overwatering issues, especially early on. Smaller pots allow for faster root development, but eventually, your plants will need more space. Its important to increase the size of the pot relative to the growth expected of the plant too. To transplant into a slightly bigger pot will not help and will be counter productive to the growth of your plant. 

Seedlings and Early Vegging: Start in small seedling pots or solo cups. Transplant when your plants develop at least three nodes. Some growers will even top their young vegging plants in these smaller pots to ensure they get the growing structure they want. 

Vegetative Growth: Move your plants into larger pots, around 11–19 litres (25–30 cm in diameter). Keep them in this pot until they’ve roughly doubled in size. To avoid root-bound in this phase of the plant’s life is crucial. So ensuring that you monitor your plant’s growth patterns is important. Once growth stagnates, consider your last transplant. 

Final Pot: Before flowering begins, transfer your plants to their final pots, typically around 38–60 litres, depending on how large you want your plants to grow. Remember that your plants will rapidly expand in growth again during this transition period, so it is important to maximise your efforts at this point. You can even plant your cannabis into the ground if this will give you better-maximising potential towards the end. When doing this, consider all the other things we discussed with the soil food web, soil conditioning and soil preparation as a whole.

For photoperiod strains, this transplanting schedule ensures that the roots have enough room to develop without becoming constrained, while also minimizing the risk of transplant shock.

Here is a table to help you figure out some basics around pot sizes.

Why transplanting matters for cannabis plants

Can You Grow Cannabis in a Single-Size Rockwool Cube?

Interestingly, cannabis can be grown in a single-size rockwool cube without the need for multiple transplants. Rockwool provides an optimal air-to-water ratio for root growth, allowing plants to thrive even when the cube remains the same size throughout the growth cycle. However, rockwool’s porous nature means that precise control of watering and nutrient levels is critical. In commercial growing operations, Rockwool is often the ideal medium selected due to its size. Allowing for high production, less cost and little to no dirt. 

While this method is convenient and reduces the need for re-potting, it’s important to monitor your plants closely. Make sure that the roots don’t become too constricted within the cube, and adjust your watering to avoid issues like waterlogging or root rot.

Why transplanting matters for cannabis plants

How to Transplant Cannabis: Step-by-Step Guide

Transplanting cannabis is a delicate process, and taking extra care during the transition will minimise transplant shock. 

Prepare your new pot: Fill it with fresh, high-quality soil, leaving enough room to fit the plant’s current root ball. What I normally do is, I will take the current pot the plant is in and place it inside the bigger pot I am transplanting in. Filling the soil around it. This ensures that you have enough room for the plant exactly. Just make sure you don’t plant it too deep in the new pot. 

Water your plant: A day or two before transplanting, water the plant to make it easier to slide out of its current pot. You don’t want completely moist soil. This will break more easily and cause more harm. You do not want the soil dry Either. So consider your watering schedule and transplanting.

Remove the plant: Gently tip the plant and pot upside down, supporting the root ball with your hand. Avoid pulling on the stem to prevent root damage. You can try squeezing gently onto the pot first to loosen the root ball from the pot too 

Transplant carefully: Place the plant into the new pot, and fill in the remaining space with soil. Lightly press down to secure the plant. When doing this step. It’s important to inspect the roots of the plant. It’s not often that you get to do this so it’s important to have a look. Are they nice and white, are they dark brown and dead?
You might want to consider pruning some dead roots off if you see some. This will also help promote and stimulate newer growth. What I personally like to do is gently break the bottom of the root ball open to help the roots grow into the new soil or pot. Just a tip I learnt from an old farmer. 

Water again: Water the plant lightly to help it settle into its new environment.

why transplanting matters for cannabis plants

What About Autoflowering Cannabis?

While photoperiod cannabis strains benefit from multiple transplants, auto-flowering cannabis should ideally be planted directly into its final pot. Autoflower strains flower based on age, not light cycles, so the stress from transplanting can slow their growth and reduce yields. To a point that the entire grow will flop. There is very little room for error with auto-flowering cannabis. Their cycles are so short that the risk of transplanting is not something growers are urged to take.  If you must transplant an auto-flower, do so early, and be extremely careful to minimize stress on the roots.

Transplanting for Bigger Yields

In cannabis cultivation, the size of the roots truly does determine the size of the fruits. Healthy, expansive roots allow your plants to absorb more nutrients, grow larger, and ultimately produce bigger flowers. Whether you’re growing in traditional pots or a single-size rockwool cube, understanding how and when to transplant your cannabis plants is key to maximising your yields.

When you get into the flow of cultivating transplanting becomes a fun activity you look forward to. It is that little bit of time you get to fully get your hands dirty again during all the monitoring and oversight periods of cultivation.

why transplanting matters for cannabis plants
Posted on

Cannabis Plant propagation

Cannabis Plant propagation

This grow series has started to take shape. We have discussed the most basic concepts and have transitioned into an organic look and approach. Today I want to focus on something else. In previous blogs, I have touched on the topic slightly but never really dedicated time to discussing the concepts you need to consider. 

If you’re looking to grow a consistent, high-quality cannabis crop, mastering the art of plant propagation is essential. Plant propagation, specifically cloning, is a popular and rewarding method for maintaining genetic consistency and keeping your favourite strains alive. I believe it is a skill set that comes with passionate growers and those who truly want the best cannabis. Because you will make a plan to keep what is considered a ‘Cash Crop.’

What is Cannabis Plant Propagation?

In essence, the most common plant propagation technique used is cloning. A simple yet effective way to create ‘new’ cannabis plants from the existing plant. Referred to as the Mother plant. Cloning allows growers to make an identical copy of the mother plant, allowing for the expansion of the same genetics to either increase yields – growing more of the exact same plant, preserve the genetics of the plant or even start up a nursery of dank you know others would love. 

For cannabis growers, propagation through cloning offers several advantages:

Consistency: Each clone will produce similar yields and quality, as they are genetic replicas. When the cuttings are taken at the optimal time the genetic preservation is kept. Clones give those who need consistency in their yields that the market appreciates more than anything.

Cost-Effective: Most home growers really benefit from this. Because budget and funds are usually tight for growing cannabis. Clones offer home growers the chance to know what they will get as well as provide them with a continuous growing cycle if the propagation is done consistently within the right timeframes. Yes, you won’t have variety but it is also cheaper to buy a clone than to purchase seed.

Speed: Clones root faster than seeds germinate, allowing for quicker harvests. This cannot be underestimated. Some growing methodologies like the indoor Sea of Green. Allows growers to take harden-off clones, give them a week of veg light and then flip them straight into flower. This can cut down grow time by many many weeks.

Cannabis plant propagation

Best Methods for Cannabis Plant Propagation

There are two primary methods of cannabis propagation: Vegetative Propagation (Cloning) and Tissue Culture.

Cloning

The most common method for cannabis propagation is vegetative cloning. This involves taking a cutting from a healthy mother plant and encouraging it to grow roots. You want to ensure that your mother plant is in a matured vegetative phase. Cutting from young vegging plants will work too, but your chances of stunting the growth of the plant will be higher. Or at least the amount of clones you can take will be less. Be mindful of where on the plant you select to cut. Not all Clones are cut equally. The higher up on the plant the more supple the stems will be as well as the concentration of growth hormones. While cutting from lower down on the plant might give a slower rooting clone, it will be harder in the stem which can produce a more robust plant from the get-go. Great for clones going outdoors.

Steps for Successful Cloning:

Select a healthy mother plant: Ensure the plant is disease-free and has strong genetics.

Prepare your cutting: Choose a healthy branch with strong growth tips. Cut at a 45-degree angle just below a node.

Apply rooting gel: Dip the cutting in the rooting gel to seal the cut area and encourage root growth.

Plant the cutting: Place the cutting into a moist, pH-balanced starter cube and keep it in a propagation tray with high humidity.

Monitor and mist: Spray the cuttings daily to keep them hydrated. Rooting typically occurs within 7–10 days.

Cloning is a simple and reliable way to propagate cannabis, but maintaining the right environmental conditions—consistent humidity, temperature, and lighting—is critical for success. Many growers fail to keep things in check which causes the attempts at cloning to fail. 

Today, our markets are so sophisticated that we need not look further than our local grow shop to get all the supplies we need. But things like cloning gels are also not really a need. You can use Aloe vera, honey, Cinnamon or even just nothing. It’s more important to ensure that once you have cut the clone you do not let air into the bottom of the cut. So to stick it in the water is much better. Then thereafter, put it in rooting gel etc…

Tissue Culture Propagation

Tissue culture is a more advanced method of cannabis propagation. Instead of taking cuttings, this method involves culturing cells or tissue in a sterile environment. Tissue culture allows for the rapid production of many clones from a single plant in a small area, which is especially beneficial for large-scale growers. The protocols around Tissue Culture can vary from strain to strain which has made it challenging to create an effective home use out of this technology for now. So it is no surprise that only high-tech medical facilities consider this technique. You can propagate thousands of plants from some small pieces of tissue. It’s rather crazy science.

Cannabis Plant propagation

Best Time to Plant Clones

The timing of planting cannabis clones is critical for successful growth. It’s best to plant your clones once they’ve developed a strong root system, which typically happens after 7–14 days in the propagation tray. The ideal time to plant is during the vegetative growth phase when your environmental conditions are optimized for root and stem development.

Avoid planting clones too early, as they may not have strong enough roots to survive the transplant process. Ensure that temperatures are stable, and your lighting and humidity levels are well-regulated to avoid transplant shock. You can also start by transplanting into smaller containers and allow for the roots to be established in this fashion.  Sticking a tiny clone directly into the soil outside will not be the way to go. Be mindful of that.

Common Mistakes to Avoid in Cannabis Plant Propagation

Overhandling cuttings: Once your cuttings are placed in their propagation cubes, avoid touching or moving them frequently, as this can damage delicate root systems. The process needs to be done effectively and swiftly. When you take your cuttings make sure all your tools are in the right place. Ready to go. The French would say, “Mise en place”

Poor sanitation: Always sterilize your tools and work area to prevent the spread of disease. Clones are so vulnerable to dying that this cannot be overlooked. Keep everything clean.

Inconsistent environmental conditions: Clones need stable humidity, light, and temperature. Fluctuations can hinder root development. Causing clones to be yellow and look thin.

Clone Count: Don’t overcrowd your propagation trays. Often growers take too many clones and try and fill the propagation trays to the brim. This causes issues when the cuttings are moist from mist and are touching one another.

cannabis plant propagation

Why Clones Can Be an Easier and More Rewarding Approach

Cloning is often considered easier than growing cannabis from seeds, especially for cultivators aiming for consistency. It’s hard sometimes to nurture something from the start during its most delicate times. Let’s also be realistic. Not everyone has the time to germinate and care for young seedlings. So investing in some sound genetics and clones can take the headache away. You know the quality to be expected as the genetic is a copy of the mother. 

When growing from seed there are many surprises that can easily challenge your skills. Although, there are challenges they are not as difficult with clones. Making the reward for the cannabis flowers so much better. When home growers invest in clones from sound nurseries. It’s almost a guarantee they will stick to it because of the ease into the growing transition it provides.

Cannabis Plant propagation

Mastering Cannabis Plant Propagation

All growers in my opinion must learn this skill. There will come a time in your growing cycle when you find a plant that is just so exceptional that you cannot just let it go. To have this skill set in our tool kit as a grower has allowed us to keep genetics alive for a very long time.  

I hope this encourages you this season to try to take your own clones and or invest in them this season to make things a bit easier and more rewarding.

Posted on

Growing Cannabis Outdoors: 7 Things To Consider When Getting Started

Growing Cannabis Outdoors: 7 Things To Consider When Getting Started

Every year, more and more people are exercising their constitutional rights as South Africans to grow their own cannabis. So often hard lessons are learned during the beginning stages that people get discouraged and never pick up growing a little bit of their own medicine for once. So here are 7 basic things to consider before you get started growing cannabis outdoors. 

  1. Assess your Growing Space

The first thing would be to assess and identify the best growing space. You want to find a space that is private and not visible to the public as well as not accessible to everyone. Cannabis is a cash crop and will always remain one. Remember that your available space will determine how many plants you can grow comfortably and which growing methodology to apply. 

It’s great to have cannabis growing and lots of it. Trust me I know… But you have to do your best not to overcrowd your space. This can cause airflow issues, leading to other issues like mould and plant diseases.

growing cannabis outdoors
  1. Evaluate the Grow Environment

Your growing environment is really important. A successful outdoor cultivator will always thank Mother Nature for a brilliant season. And pat himself/herself on the back for when she was tough on them. So consider the following:

Sunlight: We know that cannabis needs light to grow. But consider whether or not your space has enough sunlight and whether or not things like trees, buildings and street lights will influence your identified grow space. You want the most natural light exposure possible with as little obstruction as possible.

growing cannabis outdoors

Protection from the elements: Cannabis is a hardy plant. It has been shown to withstand extreme weather. But this won’t be ideal for Your cannabis. So consider the amount of rain, wind and overall temperature fluctuations the plants will experience. You might want to raise the plants off the floor if things can flood during the summer in your backyard. Just something to consider.

Pests and Pets: Most outdoor grows will be subjected to pests and diseases. It is the grower’s job to be proactive and keep and clean space as well as maintain plant health by having an Integrated pest management system in place. Companion planting, herbicide or bioactive measures can be put in place. Consider your animals, you might want to keep animals such as dogs and cats away from the cannabis plants as pet hairs can get into your flowers. They also can sometimes run around and destroy things… So consider this.

  1. Your Grow Medium

The grow medium you select is of extreme importance. It will help determine the nutrient selection for the grow cycle, your watering schedule and overall plant health and yield capacities.

In-ground vs Containers:

When you grow directly in the ground, the plants are provided with more room for root expansion. Your plants will be in one location which can have its downfalls if the weather was to get out of hand. Growing in containers gives you the ability to move your plants if you have to but also gives you more control over the root zone in general. The size of your root determines the size of your fruits. This is an old phrase that has some truth to it but really isn’t set in stone.

growing cannabis outdoors

Soil vs. Soilless Mediums: 

Soil is up of living organisms, organic material, sand, clay or loam. Is rich in nutrients and can be easier for beginners to manage. The occasional supplement of nutrients in the form of a compost tea can go a long way. Many hardcore organic growers have their own special soil mixture that they make over the years. Giving an extra uniqueness to their growing talents and cannabis as a whole. Soilless mediums like coco-coir and perlite normally are inert, it hold no nutrients. Some more experienced growers prefer this. This gives them the freedom to give the plant what it needs when it needs it. Although Soilless mediums can be treated like soil, it is important to know that it has more in common with hydroponics than it does with organics.

  1. What is your water quality like?

Water not only is essential to growing cannabis but the quality of the water will drastically affect your outcomes. Know where the water is coming from. This alone will make you smarter and more effective at growing dank. Think of the following:

Water Source: Is it rainwater, tap water or are you getting it from a dam or river? Your water source often will have its own set of challenges from pH to mineral content (TDS) and toxicity. Cannabis plants will thrive in water that is kept in check. Every phase of your plants’ life produces better at a different pH. Different nutrient uptakes and all those things are important with the pH. So knowing if you have Hard or soft water will help you in making a decision in filtration or aeration of the water prior to you feeding it to the plants. The better your attention to detail the better your cannabis plant will reward you.

growing cannabis outdoors

Watering Schedule: During the season your water demands will change. Will you be able to adjust your watering schedule and amounts? Soil and Soilless mediums have their own set of challenges when subjected to outdoor weather. Be mindful of this and ensure you can stay on top of this.

  1. Your Budget

We can spend zero rands on a grow and still grow dank. We can spend little bits of money or thousands. This is all determined by your budget and needs. Growing can be simple or complex. Your scale and the quality you wish to achieve will affect your pocket. Know that not everything is free.

Initial Setup Costs: Consider the cost of seeds or clones, Growing containers or even building raised beds, nutrients, grow medium and equipment you will need like pH meters, soil moisture meters etc. Everything adds up. And they add up quickly. So budget ahead of time. See what you can afford and use what you can. Here is what I did when I started. I couldn’t afford a pH meter. So I went to my local fish pet store and bought the liquid pH test kit. It will give you an indication of where you are on the pH scale.

growing cannabis outdoors

Backup Funds: Knowing that things will break and eventually need replacing. You should consider building a fund for your grow to help replace things as the grow is ongoing. YOu will find that many other expenses will pop up for things unexpected. Instead of having it surprise you and take from your day-to-day money. Put a little bit aside for this event. It is bound to happen.

  1. Do you have the Time?

Growing really good cannabis is time-consuming. Like anything else. The more you invest into it the more it can reward you. Be realistic regarding this. Do not expect the best out of the plants if you are not present. 

Time Commitment: You need to water the plants. Monitor them for issues and perform basic clean-up on the plant. If you don’t it will just negatively affect your desired outcomes and cause more issues in the growing cycle. How much time do you really have for all this? Maybe growing all those plants is not gonna work… Start small and grow within your means.

You should set up an almost ritualistic schedule around your plants and your lifestyle. If you have to be somewhere by 8 am… Be in the garden by 7… if you get home at 5 pm… start your monitoring at 6 pm… Make a plan but don’t do nothing.

  1. Are you willing to Adapt?

Growing Cannabis Outdoors is rewarding but it can truly challenge you as a person. Are you tenacious and do you think out of the box? Sometimes you are forced to be creative to help your plants. Sometimes you need to be a scientist to get the best out of your cannabis. Are you capable of this? Or even willing to give it a go?


Problem-Solving: Your ability to respond to these challenges will greatly impact the quality of your grow. Whether it’s adjusting to an unexpected cold snap or finding a quick solution to a pest infestation, being adaptable is key.

Learning and Adjusting: Each growing season offers lessons. If something goes wrong, take it as an opportunity to learn and improve your methods for the next season. Your willingness to adapt and evolve will be a major factor in your success.

Growing cannabis outdoors

Starting an outdoor cannabis grow can be an incredibly rewarding experience, but it requires careful planning and consideration of several factors. By taking the time to assess your space, environment, grow medium, water quality, budget, schedule, and adaptability, you’ll set yourself up for a successful growing season. Remember, every grow is a learning experience, so don’t be afraid to make adjustments along the way and learn from your successes and challenges. Happy growing!

Posted on

Growing From Seed or Clone?

Growing from seed or clone

As the cannabis industry continues to flourish, many enthusiasts and cultivators are diving into the art of growing their own plants. It’s truly remarkable. The amount of new growers every season grows exponentially. 

One of the most crucial decisions they face is whether to grow from seeds or clones. Both methods have their unique advantages and disadvantages, and understanding these can help growers make informed choices. Today, we will delve into the pros and cons of growing cannabis from seeds and clones, providing detailed insights to help you determine the best approach for your cultivation goals. For the sake of it all, when we mention “seeds” or “seed” we refer to regular cannabis seeds. Not feminized seeds, nor autoflowering cannabis seeds. This is a topic for a different day.

Understanding Cannabis Seeds

Genetic Diversity

One of the primary benefits of using seeds is the genetic diversity they offer. Each seed results from pollination between a male and a female plant, creating a unique genetic combination. This diversity allows growers to explore various strains and phenotypes, potentially discovering new and exciting characteristics. Something most experienced growers are looking for. Some growers grow hundreds , thousands of regular plants at a time to find only 1 or 2 very unique cannabis plants. These are the plants that we the consumers are enjoying on the streets. For every strain, Girl Scout Cookies to make it to market, thousands of cannabis plants went through a genetic selection. And this is truly the beauty of regular cannabis seeds.

growing from seed or clone

Stronger Root Systems and Higher Yield

Plants grown from seeds typically develop stronger root systems. This robust root structure supports vigorous growth and can lead to higher yields compared to clones. The extensive root network allows the plant to absorb more nutrients and water, fostering healthier and more productive growth. It is not to say that it will always produce stronger and higher yields. Just bare this in mind.

Pest and Disease Resistance

Seeds generally exhibit greater pest and disease resistance. Since they are not direct clones of another plant, they do not inherit any genetic weaknesses or susceptibilities. This resilience can result in a healthier garden with fewer pest and disease issues. Local cultivators have used cannabis breeding to their utmost benefit. They are purposefully breeding more and more mould-resistant genetics, for local markets. Allowing for more superior terra-flowers to grow

Longer Growing Time

However, growing from seeds involves a longer growing time. Seeds need to germinate, and the seedlings must establish themselves before they start to grow vigorously. This initial phase can take several weeks, extending the overall cultivation period. This generally doesn’t bother the organic grower that grows with the season in a greenhouse or outside. An indoor grower should consider their cultivation time much more, as this will directly implicate in electricity bills for longer light running time. During this grow phase of the plant your lights will run at an average 18 hours on 6 hours off.

growing from seed or clone

Gender Identification

Another challenge with seeds is gender identification. Cannabis plants can be male, female, or hermaphroditic. Male plants must be identified and removed to prevent pollination, which can lead to seedy buds and reduced potency in the female plants. This process requires careful monitoring and early identification of male plants. Spending time to grow from seed just to find a male plant that won’t produce flowers is not ideal either. Hence why there are some transplanting and stages that growers set up for themselves during the vegetative phases of the plant in order to streamline and cut costs on the grows. 

Variable Quality

Not all seeds will grow into healthy plants, leading to variable quality. Some seeds may fail to germinate or produce weak plants, which can be frustrating and costly. It is essential to source high-quality seeds from reputable breeders to minimize these risks. Thankfully our market is becoming more and more sophisticated by the year, and finding a reputable online source has become easier. Some grow stores even sell seeds too.

Exploring Cannabis Clones

Consistent Quality

Clones offer consistent quality because they are genetically identical to the parent plant. This uniformity ensures that the desired traits, such as potency, flavour, and growth characteristics, are preserved in each new plant. For commercial growers, this predictability is invaluable. But more and more home growers are finding that this is much easier for them to manage, saving them time and money. You know what you will get and that is also not a bad thing for cultivators.

Faster Growing Time

Clones can be planted directly into the growing medium and begin developing immediately, leading to a faster growing time. This accelerated growth cycle allows growers to harvest more frequently, increasing overall productivity. When sourcing clones from a grower or entity, they should come ready to plant. A sign of a good nursery is the state of health the plants arrive in. You skip 4-6 weeks out of your cultivation and depending on your method of cultivation some can go straight into the flower phase from a 20cm clone. Cutting down Cultivation to 8 – 10 weeks.

growing from seed or clone

No Gender Identification Needed

With clones, there is no need for gender identification. Since clones are taken from a female plant, all the new plants will also be female. This eliminates the risk of accidental pollination and ensures that all plants produce high-quality, seedless buds. The only risk you might run into is hermaphrodism, as plants that come under high-stress seed themselves, called Selfing. 


Limited Genetic Diversity

However, clones come with their own set of limitations. One significant drawback is the limited genetic diversity. Using clones restricts growers to the genetics of the parent plant, which can be a disadvantage if those genetics are not ideal for certain growing conditions or if they lack desirable traits. Growers should always be mindful of the strains they are selecting and in which environment their clones come from.

Increased Risk of Pests and Diseases

Clones can also carry over pests and diseases from the parent plant. Any genetic weaknesses or susceptibilities present in the parent will be passed on to the clones. This can result in increased vulnerability to infestations and infections, requiring vigilant pest management practices. If the clones come dirty to you and you don’t have any protocol in place, you will infect the entire grow space. So another trick when getting clones from anyone would be to isolate and treat them first for any mould and bacteria before introducing them to the space. Pathogens can latch on during the transportation process, insect vectors and many other things. So just because you getting them from a clean nursery doesn’t mean when they arrive by your doorstep they will be clean.

Making the Right Choice

Choosing between seeds and clones ultimately depends on your specific needs and preferences. Here are some factors to consider when making your decision:

If you value genetic diversity and enjoy experimenting with different strains, growing from seeds might be the better option. Seeds offer the opportunity to discover unique phenotypes and tailor your garden to specific preferences. However, if you prioritize consistent quality and uniformity in your harvests, clones are likely the way to go. The predictable nature of clones ensures reliable results with every crop.

Assess the time and effort you are willing to invest in your cultivation process. Growing from seeds involves a longer initial phase and the need for gender identification, which can be labour-intensive. Clones, on the other hand, streamline the process by eliminating the need for these steps and speeding up the growth cycle.

growing from seed or clone

Conclusion

Both seeds and clones have their distinct advantages and drawbacks. Understanding these can help you make an informed decision that aligns with your cultivation goals. Whether you choose the genetic diversity and higher yield potential of seeds or the consistent quality and faster growth of clones, it is crucial to source your seeds or clones from reputable suppliers. High-quality genetics are the foundation of a successful cannabis garden, ensuring healthy plants and bountiful harvests.

Posted on

5 Common Pests & Diseases

5 common pests & diseases

Healthy and robust plants are less attractive to pests and diseases, however weak and malnourished plants are attacked more easily. At the same time, healthy plants are better equipped to deal with the attack, while the weak will be less able to cope. Early detection of the problem is a major factor in its eradication.

In outdoor cultivation, we can count on the help of certain plants. For deterrence of cannabis pests, companion plants such as Nasturtium, Chinese Carnation, basil, wormwood and sage can be planted to form a micro-balanced and self-regulating ecosystem. Generally, flowers and herbs help ward off pests and attract beneficial insects to our garden.

Let’s look at some more methods for the treatment of the 5 most common pests in the South African climate. We always aim for ecological solutions, as cannabis is a product intended for human consumption.

Pests and Disease

Spider mites

Spider mites are tiny arachnids, often less than 1 millimetre in size, that infest various plants. These pests are known for their ability to reproduce rapidly, leading to severe infestations if not managed promptly. Spider mites feed on plant sap by piercing plant cells with their mouthparts, causing damage that appears as tiny yellow or white spots on leaves. Over time, this feeding can lead to leaf discolouration, wilting, and even plant death. Spider mites thrive in hot, dry conditions and are commonly found on the undersides of leaves, where they spin fine webs as they feed and reproduce.

What to do:

A simple homemade remedy to control spider mites involves using a mixture of water and mild liquid soap. Combine two tablespoons of liquid dish soap with one quart of water in a spray bottle. I add a teaspoon of cayenne pepper too. Shake the mixture well and spray it directly onto the affected plants, ensuring to cover the undersides of the leaves where spider mites are likely hiding. The soap solution works by suffocating the mites and disrupting their cell membranes. The pepper will act as a deterrent, helping get rid of the mites. For best results, apply the solution in the early morning or late evening to avoid harming beneficial insects and to minimize the risk of leaf burn from sunlight. Reapply every few days until the infestation is under control.

We have the options here of help from certain organic products and predatory insects:

The most effective red spider mite predators are Phytoseiulus persimilis, and Amblyseius californicus which can be bought online. Always follow the retailer’s directions closely. We must remember that if we use live predators we should, under no circumstances use pesticides too, even organic ones. Notably, temperatures above 26 degrees and low relative humidity favour their proliferation.

Well-known organic remedies include wettable sulfur, potassium soap, pyrethrins, neem, or natural products that have extracts of cinnamon, camomile or wormwood.

pests and diseases

White fly

Whiteflies are small, winged insects that belong to the family Aleyrodidae. They are typically found on the undersides of leaves and are known for their white, powdery wings. Whiteflies feed on plant sap, extracting nutrients and weakening the plant. This feeding process can lead to yellowing of leaves, stunted growth, and a general decline in plant health.

Additionally, whiteflies excrete a sticky substance called honeydew, which can attract sooty mould, further harming the plant and reducing its ability to photosynthesize effectively.

What to do:

Both for early detection and for eradication, chromatic traps (sometimes also called ‘cues’) are a good call. These insects are attracted to the color yellow, and become stuck in the traps.

Good organic remedies include neem, pyrethrum and other medicinal plants (such as Nasturtium, Marigold, Onions and Garlic) are also effective.

A homemade remedy to control whiteflies involves using a mixture of water, liquid dish soap, and neem oil. In a spray bottle, combine one quart of water with one tablespoon of liquid dish soap and one teaspoon of neem oil. Shake the mixture well and spray it onto the affected plants, focusing on the undersides of the leaves where whiteflies congregate. The soap helps to suffocate the insects, while neem oil acts as a natural insect repellent and disrupts the life cycle of the whiteflies. Apply this solution in the early morning or late evening to avoid harming beneficial insects and to prevent leaf burn. Reapply every few days until the whitefly population is under control.

As the most effective remedy we have some natural predators – in this case, the very effective Encarsia Formosa wasps, Macrolophus (also good for spider mites) or Amblyseius swirskii, which stands out amongst others for its effectiveness and resistance to high temperatures.

Pests & Diseases

Caterpillars

Caterpillars are the larval stage of butterflies and moths, belonging to the order Lepidoptera. These larvae are typically elongated, soft-bodied, and segmented, with varying colours and patterns depending on the species. Caterpillars are voracious feeders, primarily consuming leaves and other plant parts, which can lead to significant damage in gardens and agricultural crops. As they feed, they create holes and ragged edges on leaves, weakening the plants and affecting their growth and productivity. Some caterpillar species can also burrow into fruits and stems, causing further harm to the plants. Caterpillars cause great damage outdoors and in the greenhouse or polytunnel. They are difficult to combat and can leave growers defeated.

What to do:

Spotting them early and taking preventative action would be the ideal way of going about them. Once they get going, you can lose crop overnight without seeing any damage… Until it is too late and buds are falling off from the plants. 

A homemade remedy to control caterpillars without using bacteria involves a mixture of water and chili pepper. To make this solution, blend two fresh chili peppers with one quart of water until smooth. Strain the mixture through a cheesecloth or fine mesh to remove any solid particles, then pour the liquid into a spray bottle. Add a few drops of liquid dish soap to help the solution adhere to the leaves.

Spray the chilli pepper solution onto the affected plants, focusing on areas where caterpillars are present. The capsaicin in the chilli peppers acts as a natural deterrent, making the leaves unpalatable to caterpillars. Be sure to apply the spray in the early morning or late evening to avoid harming beneficial insects and to prevent leaf burn from sunlight. Reapply every few days or after rainfall until the caterpillar population is under control.

Another way is pheromone trapping. Pheromones are chemicals produced by females to attract males. They consist of a trap for adult butterflies and moths; males are attracted to pheromone tablets and poisoned, thus disrupting the reproductive cycle and preventing Caterpillar proliferation.If you are growing in a greenhouse, it is worth using fabrics or nets.

Another weapon is Bacillus thuringiensis, a bacterium that attacks the digestive system of caterpillars causing them to die of starvation. However, we recommend a selective use of them because many applications may have residual effects on our buds. Steinernema carpocapsae is another predator, a microscopic roundworm that lives in the soil, and is an entomopathogenic nematode.

Pests & Diseases

Powdery mildew

Powdery mildew is a common fungal disease that affects a wide variety of plants, characterized by white or greyish powdery spots that form on the leaves, stems, and sometimes flowers and fruits. This disease thrives in warm, dry climates and can spread rapidly, covering entire plant surfaces if not controlled. The powdery coating can block sunlight, reducing photosynthesis and weakening the plant. Infected leaves may become distorted, turn yellow, and eventually drop off, leading to reduced plant vigour and yield.

What to do:

Fungi are very, very difficult to combat, once they appear, both outdoors and indoors. It is possible to take preventive measures such as proper ventilation and humidity control, and good spacing between plants. As for treatments we have with sulfur, horsetail, nettle extracts, cinnamon, and Propolix. There are also specific microorganism extracts which inhibit the growth of the fungus.

A simple homemade remedy to control powdery mildew involves using a mixture of baking soda and water. Combine one tablespoon of baking soda with one quart of water in a spray bottle. To enhance the effectiveness, add half a teaspoon of liquid dish soap, which helps the solution stick to the leaves. Shake the mixture well and spray it onto the affected plants, thoroughly covering all surfaces, including the undersides of leaves. The baking soda alters the pH level on the leaf surface, creating an environment that is inhospitable to the powdery mildew fungus. For best results, apply the solution in the early morning or late evening and reapply once a week or after rain until the powdery mildew is under control.

Botrytis

Botrytis, commonly known as grey mould, is a fungal disease that affects a wide range of plants, especially in cool, damp conditions. It is caused by the fungus Botrytis cinerea, which produces greyish-brown, fuzzy spores on the surfaces of infected plant tissues. This disease can affect leaves, stems, flowers, and fruits, leading to soft, rotting areas that may be covered with the characteristic grey mould. Botrytis can spread rapidly, particularly in humid environments, causing extensive damage to crops and ornamental plants by promoting decay and inhibiting growth. 

Also very difficult to combat and prevent. Spores of all fungi, float in the air and spread very quickly. Botrytis is perhaps the most difficult fungus to fight.

What to do:

Trichoderma harzianum is a natural fungicide which colonizes the root, can act as a protective barrier act minimizing the spread of pathogenic fungus. Other options include Bacillus subtilis or Bacillus velezensis, bacterias that slow the spread of Botrytis. Wormwood extract and thyme are also useful for preventing this.

Once Botrytis is detected, manually or with scissors, remove the infected buds, place them quickly into a bag and throw them away. Remove the entire plant if it is too affected in order to minimize its spread.

We see that insects in general are a little less difficult to combat, because their life cycle, although very fast, is much slower than that of fungi. However, the best way to prevent significant loss is to closely observe your plants, as early detection is always the best control tool. If you take care of your plants they will take care of you.

Posted on

Weed is Stronger Than Ever: Is this a good thing?

Weed is stronger than ever

As a seasoned vet in the industry, it’s evident that the landscape of cannabis consumption has undergone profound changes in recent years. From the evolving potency of cannabis products to groundbreaking research shedding light on its effects, there’s a wealth of information to explore.

The Potency Paradox

One of the most notable shifts in the cannabis industry is the remarkable increase in potency. Gone are the days of mild strains with THC levels hovering around 5-6%. Today’s cannabis products boast THC concentrations reaching as high as 25% or even 90% in concentrated forms like oils and edibles. This surge in potency has been fueled by advancements in cultivation techniques and selective breeding aimed at maximising THC content.

While some may view this increase in potency with apprehension, it’s essential to understand that potency alone does not dictate the effects of cannabis. Recent research has challenged the notion that higher potency equates to increased impairment. 

In fact, studies have shown that for regular, near-daily cannabis users in familiar environments, there may be little to no difference in cognition between being sober and being under the influence of cannabis. This finding challenges long-standing stereotypes about the cognitive effects of marijuana use and underscores the importance of considering factors such as frequency of use and environmental context.

How strong was the weed?

Back in the early 2000s late 90s. Cannabis potency was topping out at about 15% with outliers coming in at 19%. Strong cannabis that used to sit us all down. Strains like Chronic and Skunk. 

Known to have gotten the job done, today will be considered not potent at all. A remarkable achievement in cultivation techniques and methodologies is to blame. People are getting more talented every year and their skills increase. They are allowing for more and more specialised cannabis strains. Bred for specific levels of potency and effects. In the past, it was about completing the grow with little to no hick ups and moving it. The discussion on how strong the weed was, wasn’t an actual conversation that was had. It was something merely appreciated about the cannabis.

How strong is the weed today?

Well in today’s market. Everyone wants to know how strong the weed is. The market is sophisticated enough to provide the answers too. Something we should all be thankful for. But even so, the average percentage of THC levels is roughly 19% these days. With cannabis strains breaking records on THC % every year. In 2023 the highest THC levels were at 36% in cannabis flower. Ridiculous. Makes you wonder to what end it has to be that potent. 

A Rich History

Despite its modern resurgence, cannabis has a rich and storied history dating back thousands of years. First domesticated in East Asia, cannabis has been utilized for a myriad of purposes, from making hemp rope and clothing to serving as a source of food through its oily seeds. Evidence of cannabis use can be traced back to ancient civilizations, with archaeological finds revealing its presence in burial sites dating back thousands of years. This long history underscores the enduring relationship between humans and cannabis, spanning cultures and continents.

The Science Behind Cannabis

Advancements in scientific research have also played a pivotal role in shaping our understanding of cannabis. With over 100 active cannabinoids, including well-known compounds like THC and CBD, researchers are continually exploring the therapeutic potential of these compounds. While cannabinoids have become widespread in various products, their full effects are still being determined. The illegality of cannabis for much of modern history has posed challenges to research efforts, but recent strides have been made in unravelling the mysteries of cannabis and its compounds. Making it easier for us to understand all the benefits that the plant has for us.

One notable example is the groundbreaking research conducted by UBC doctoral candidate Michelle St. Pierre. Through her studies, St. Pierre sought to investigate how cannabis impacts cognition, particularly in familiar environments. Contrary to stereotypes, her findings revealed little to no impairment in cognitive function for regular cannabis users in familiar settings. This research challenges preconceived notions about the cognitive effects of cannabis use and highlights the importance of conducting studies in real-world contexts.

Kicking the Idea that a person stoned cannot function and that they are lazier. A type of stigma that needs to be broken. The question I have is, How do we break this stigma if one research is still lacking and 2 the weed is becoming so potent? We as users need to take more responsibility for what is happening in the market and learn to say “No” to certain things that will give us a bad rep. 

Looking Ahead

As the cannabis industry continues to evolve, it’s crucial to separate fact from fiction and dispel long-standing myths surrounding cannabis. From its ancient origins to its modern resurgence, cannabis has played a significant role in human history, with its potential for therapeutic use being increasingly recognized. As researchers delve deeper into the science of cannabis, we can expect to uncover new insights and unlock the full potential of this remarkable plant.

And while weed may indeed be stronger than ever, it’s essential to approach the topic with nuance and an understanding of the complex interplay between potency, usage patterns, and environmental factors. By staying informed and embracing evidence-based research, we can navigate the ever-changing landscape of cannabis with clarity and insight.

We know already that potency isn’t everything, yet the push for stronger bud continues. It is only by wanting to accept this that we can look to more healing and overall better cannabis for our well-being.

Leave your thoughts on the matter below.